Data labeling
A Short Introduction to Video Annotation for AI [2024]
18 min read
—
Jul 4, 2022
Find out what video annotation is and how it can be used in computer vision. Explore different techniques to annotate videos for AI and learn best practices.

Content Creator
Annotating data for AI models is one of the core aspects of computer vision. Working with images seems pretty straightforward, and almost everyone could label a single image with some patience and basic training.
But—
Annotating videos is an entirely different beast.
Let's crunch the numbers. A minute of video footage at 30 frames per second translates into 1800 images—arranged in a sequence.
This does add an extra layer of complexity.
To annotate video footage you need to know what you are doing. And have a plan. Otherwise, it can be a soul-crushing experience.
Luckily, we can help.
After reading this article, you’ll know:
What is AI video annotation, and how does it work
Types of video annotations for machine learning
How to annotate videos for AI training
Best practices, challenges, and future opportunities
AI video annotation: definition and benefits
In the context of machine learning, annotations are used to label and categorize data. They used to teach computers how to recognize specific objects or situations.
For example, a dataset that contains cats and dogs might be annotated with the appropriate labels. We can then train our computer vision model to tell us whether a new image or footage has a cat or a dog in it.
Data annotation is one of the essential tasks linked to developing real-world AI solutions. It forms the basis for training data for supervised learning models.
Video Annotation for AI involves adding labels or masks to video data to train AI computer vision models. This can be done manually or, to a certain degree, automatically. The labels can be anything from simple identification of objects to distinguishing complex actions and emotions.
Annotations and AI video labeling can be used for:
Detection. You can use annotations to train the AI to detect objects in video footage. For instance, it can be used to detect cars, road damage, or animals.
Tracking. AI can track objects in video footage and predict their next location. Object tracking comes in extremely handy for tasks such as monitoring pedestrians or vehicles for security purposes.
Location. You can train the AI to find objects in video footage and to provide coordinates. This can be used, for instance, for monitoring occupied and unoccupied parking spaces or coordinating air traffic.
Segmentation. By creating different classes and training your AI models to recognize them you can categorize different objects. For example, you can create an image segmentation system that uses video footage to group and count ripe and unripe berries.
In short, by annotating data we show our AI what exactly we are interested in. The goal is to train the models to recognize patterns so that they can automatically label new data.
Here is an example of a computer vision system that monitors whether construction workers are wearing the correct safety gear.
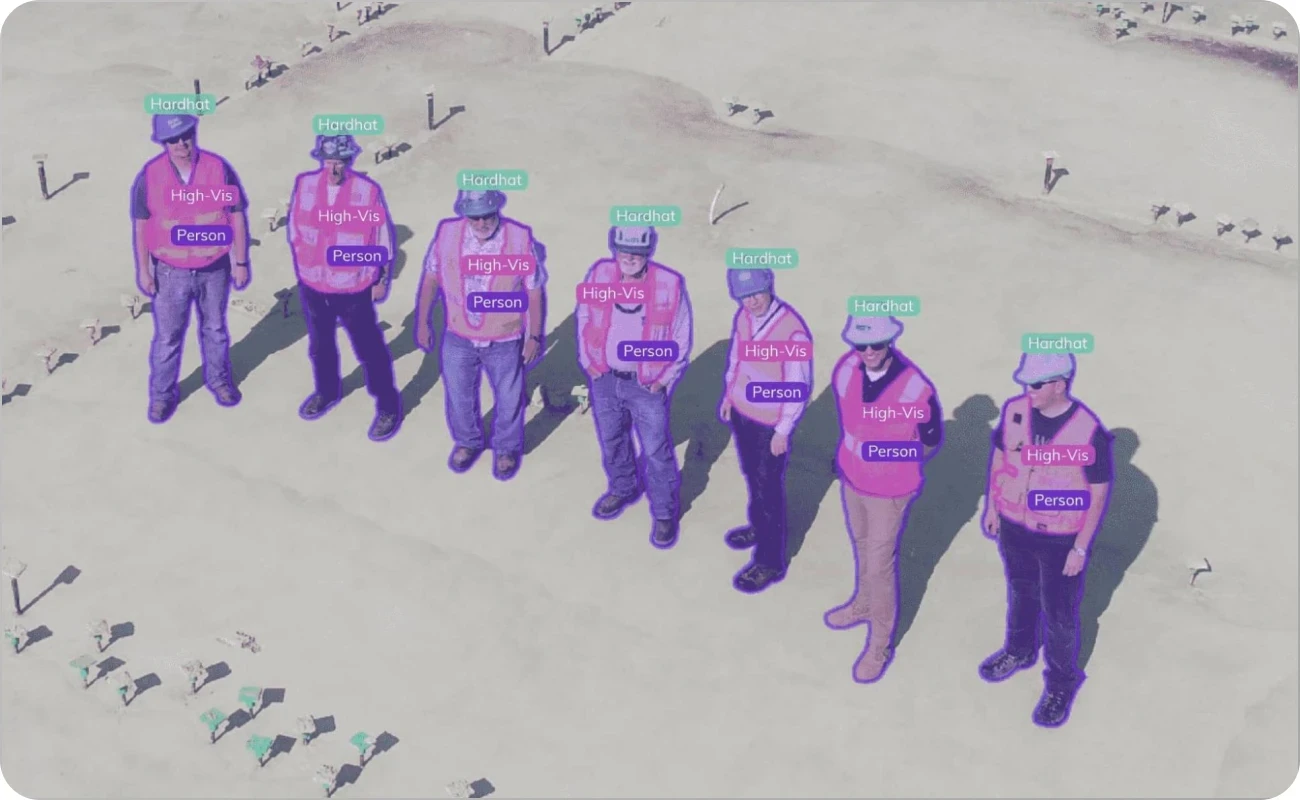
The system uses cameras to capture video footage of the construction site. But the raw footage does not contain any data other than information about hue, saturation, and lightness of individual pixels. Computers don’t really recognize the items of clothing or people in the video.
Now, by annotating videos we create a bridge between the physical world and its digital representation. We can label elements of any video footage to name a class of the real world object that computers can understand later.

In our example, the initial training involved annotating frames showing people wearing high-visibility clothing and hard hats at different angles. Now, this AI model can recognize if a person is wearing the right equipment. It is a good example of an AI system that applies video footage processing to implement best practices and improve employee safety.
Why is annotating videos better than annotating individual images?
Videos are basically sequences of images. But annotating them as videos, and not just individual frames, will provide more contextual information for your AI models. Additionally, many annotation tools offer additional features that make working with videos more convenient.
The benefits of annotating video footage:
You can interpolate. With AI annotation tools you don’t have to annotate every single frame. Sometimes you can annotate the beginning and the end of your sequence and then interpolate between them. The in-between annotations will be created automatically.
Temporal context unlocks new possibilities. Videos contain motion, which can be difficult for a static image-based AI model to learn. By annotating videos, you can provide data that helps the AI model understand how objects move and change over time.
Better data for training your AI models. Videos contain more information than images. When you annotate a video, you are providing the AI system with more data to work with, which can lead to more accurate results.
It is cost-effective. You can get more data points from a single video than from a single image. And by focusing only on selected keyframes, the whole process is less time-consuming.
More real-world applications. Annotated videos can more accurately represent real-world situations and can be used to train more advanced AI models. This means more computer vision applications, ranging from sports to medicine and agriculture.
While there are many advantages of annotating videos over images, the process is still a time-consuming and complex task. Video annotators must learn how to use the right tools and workflows.
What does a video annotator do exactly?
A video annotator is responsible for adding labels and tags to video footage. These are later used for training artificial intelligence systems. The process of adding labels to data is known as annotation, and it helps the AI models to recognize certain objects or patterns in the video.
If you are new to the process, the best thing to do is to learn the essential techniques and know which type of annotation is the best for the job. Let's explore some of the most useful methods,
Types of video annotation
Different situations require different types of V7 video annotation. It all depends on what kind of data we are collecting and how accurate we want it to be.
When monitoring an intersection from a bird's eye view, it may be enough for us to represent cars as rectangles moving on a flat, two-dimensional surface. In other cases, we might need to represent the car as a three-dimensional cuboid, including its height, width, and length.
Sometimes reducing an object to a rectangle or a cuboid is still too abstract. Some types of video annotation, such as those used for AI pose estimation, require labeling specific body parts.
Pose detection requires using keypoints in order to accurately detect and track the athlete's movements. The keypoint skeleton provides a framework that the detection algorithm can use to identify the athlete's body parts and follow their position.
The most common techniques used in video annotation for AI are:
Bounding boxes
Ellipses
Polygons
Keypoints
Keypoint skeletons
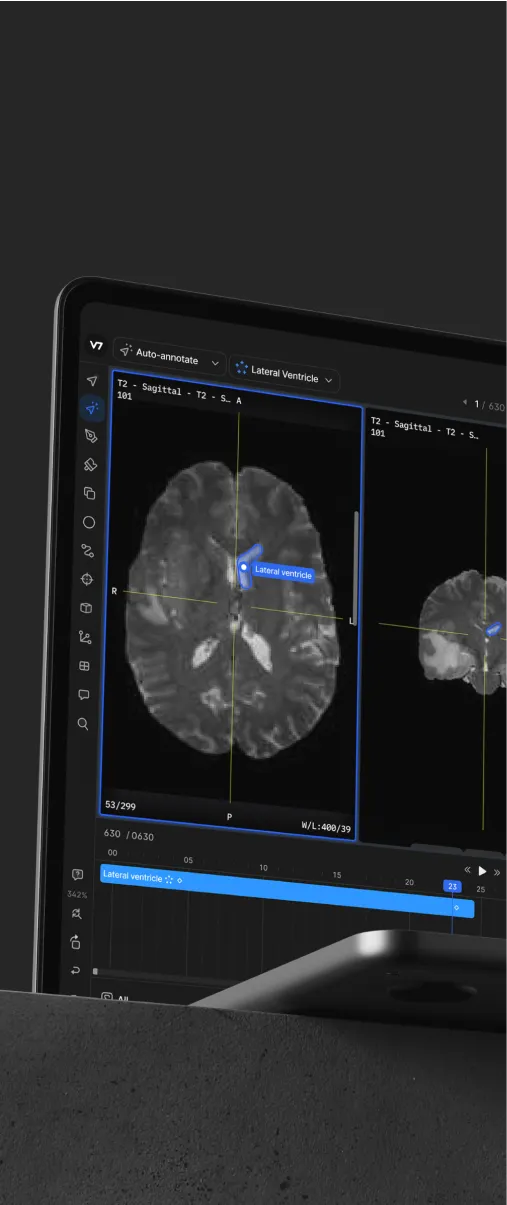
Auto-annotation
3D cuboids
Let’s go through some of them now.
1. Bounding boxes & ellipses
The simplest form of annotation is a bounding box. It is a rectangular box that surrounds an object in a frame.
Bounding boxes can be used for generic annotations of all kinds of target objects. If we don’t have to worry abouts some elements of the background interfering with our data, we can use boxes as our all-purpose video annotation tools.
The bounding box can be used to determine the location and size of the person or object in your frame. If we need accurate data, they are particularly useful for annotating regular shapes such as cars or buildings. For annotating circular and oval objects, such as balls, we can also use elliptical selection.
2. Polygons
A polygon is a closed figure that is made up of a set of connected line segments. A polygon can be used to annotate objects that have irregular form. Polygons can have a very complex shape and are very versatile for annotating any object in your video.

3. Keypoints & keypoint skeletons
If we don’t need to concern ourselves with the shape of an object, keypoint are extremely useful for video annotations. They are great for marking arrays of essential points that we want to track. For example, annotating eye movement in relation to other parts of the face would be a good scenario for using keypoint annotations.
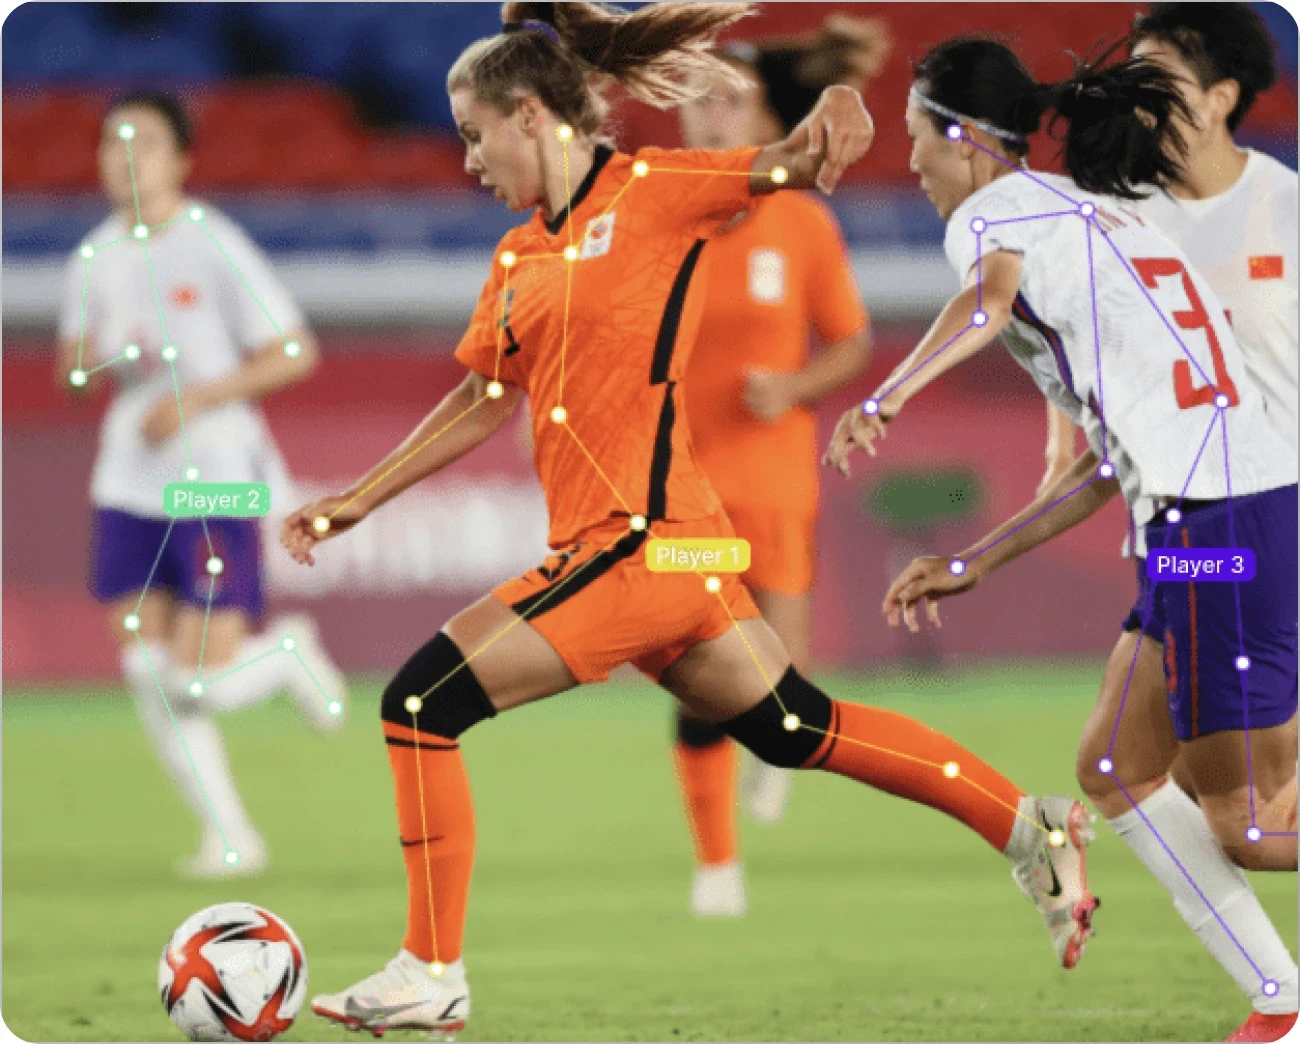
If our keypoints form a complex structure of interconnected elements, creating a keypoint skeleton may be more suitable. For instance, if we want to teach our AI model to analyze the movement of soccer players, we can create a keypoint skeleton of a human figure. Our video footage of players can be annotated with the skeletons and we can use it to track their movements very precisely.
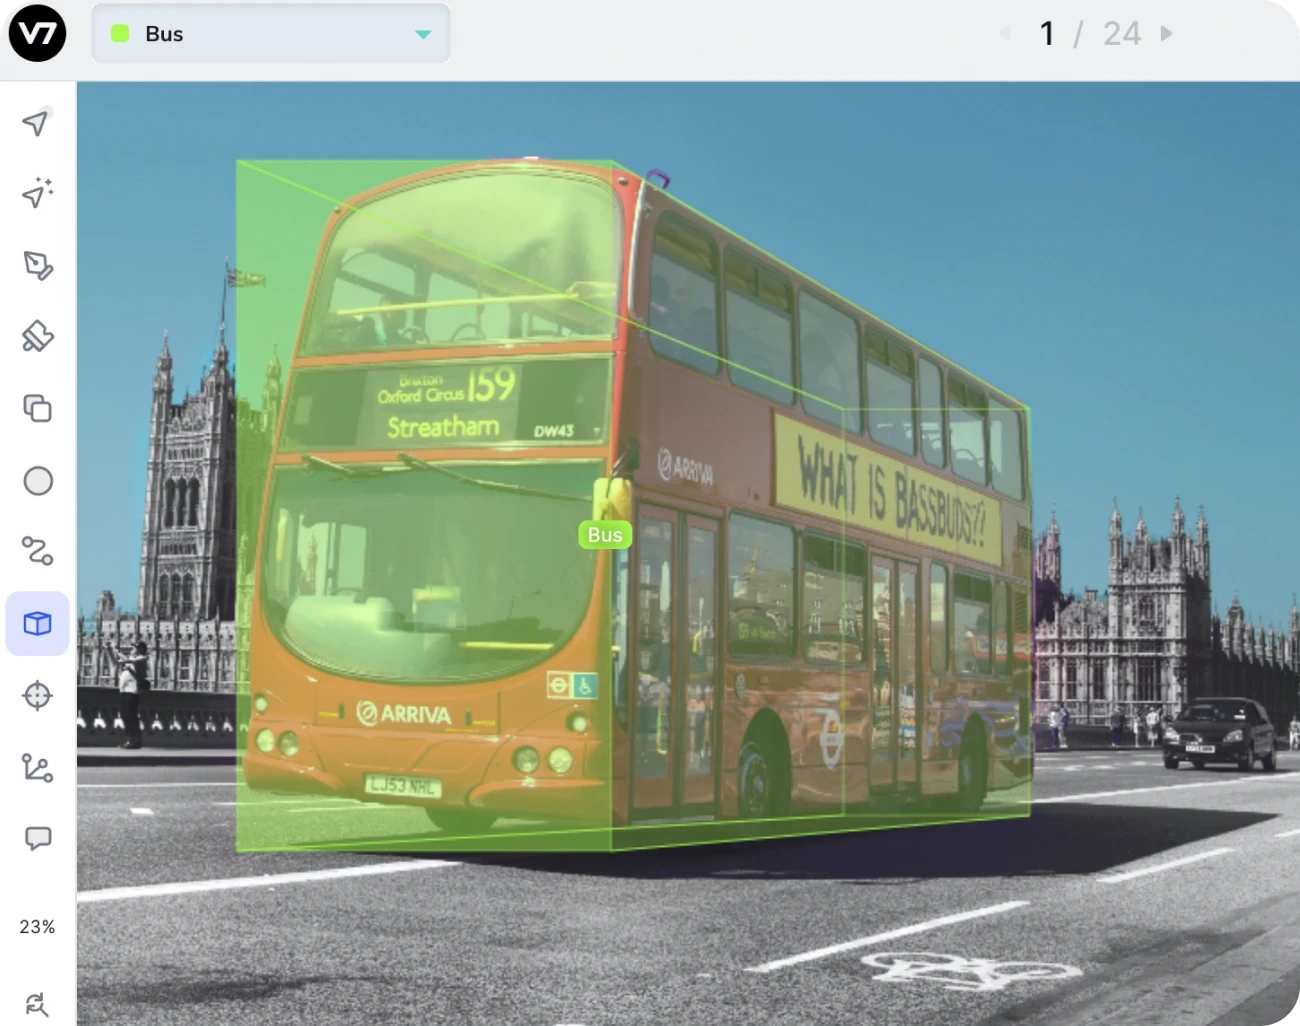
4. 3D cuboids
Cuboids can be used to annotate objects in three-dimensional space. This type of annotation allows us to specify the size, orientation and position of an object in a frame. It is particularly useful for annotating objects that have a 3D structure, such as vehicles, houses, or furniture.
5. Auto-annotation
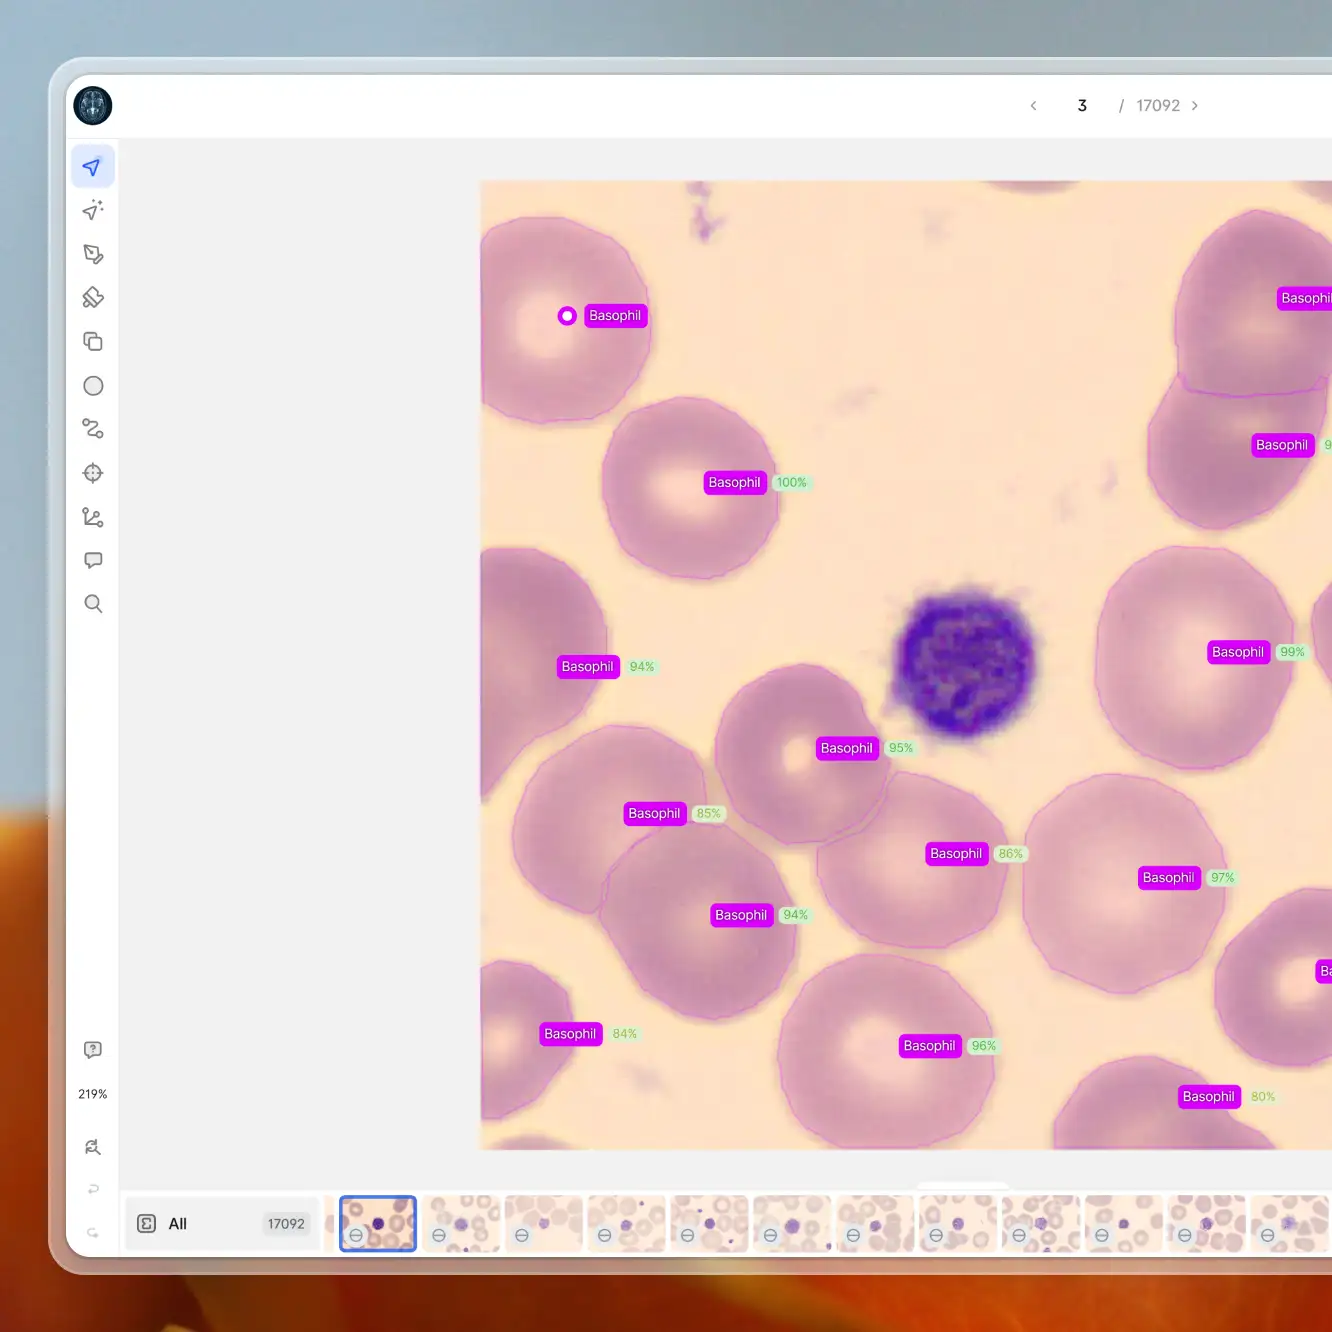
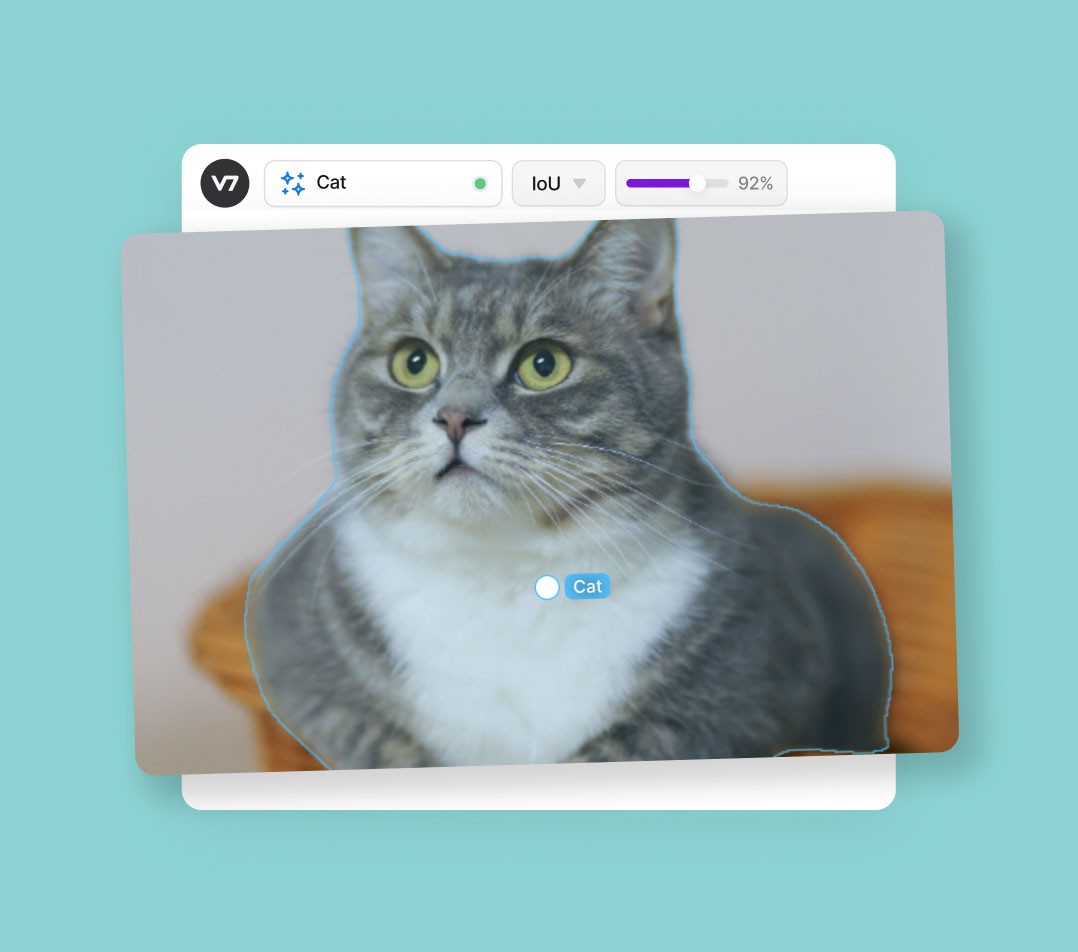
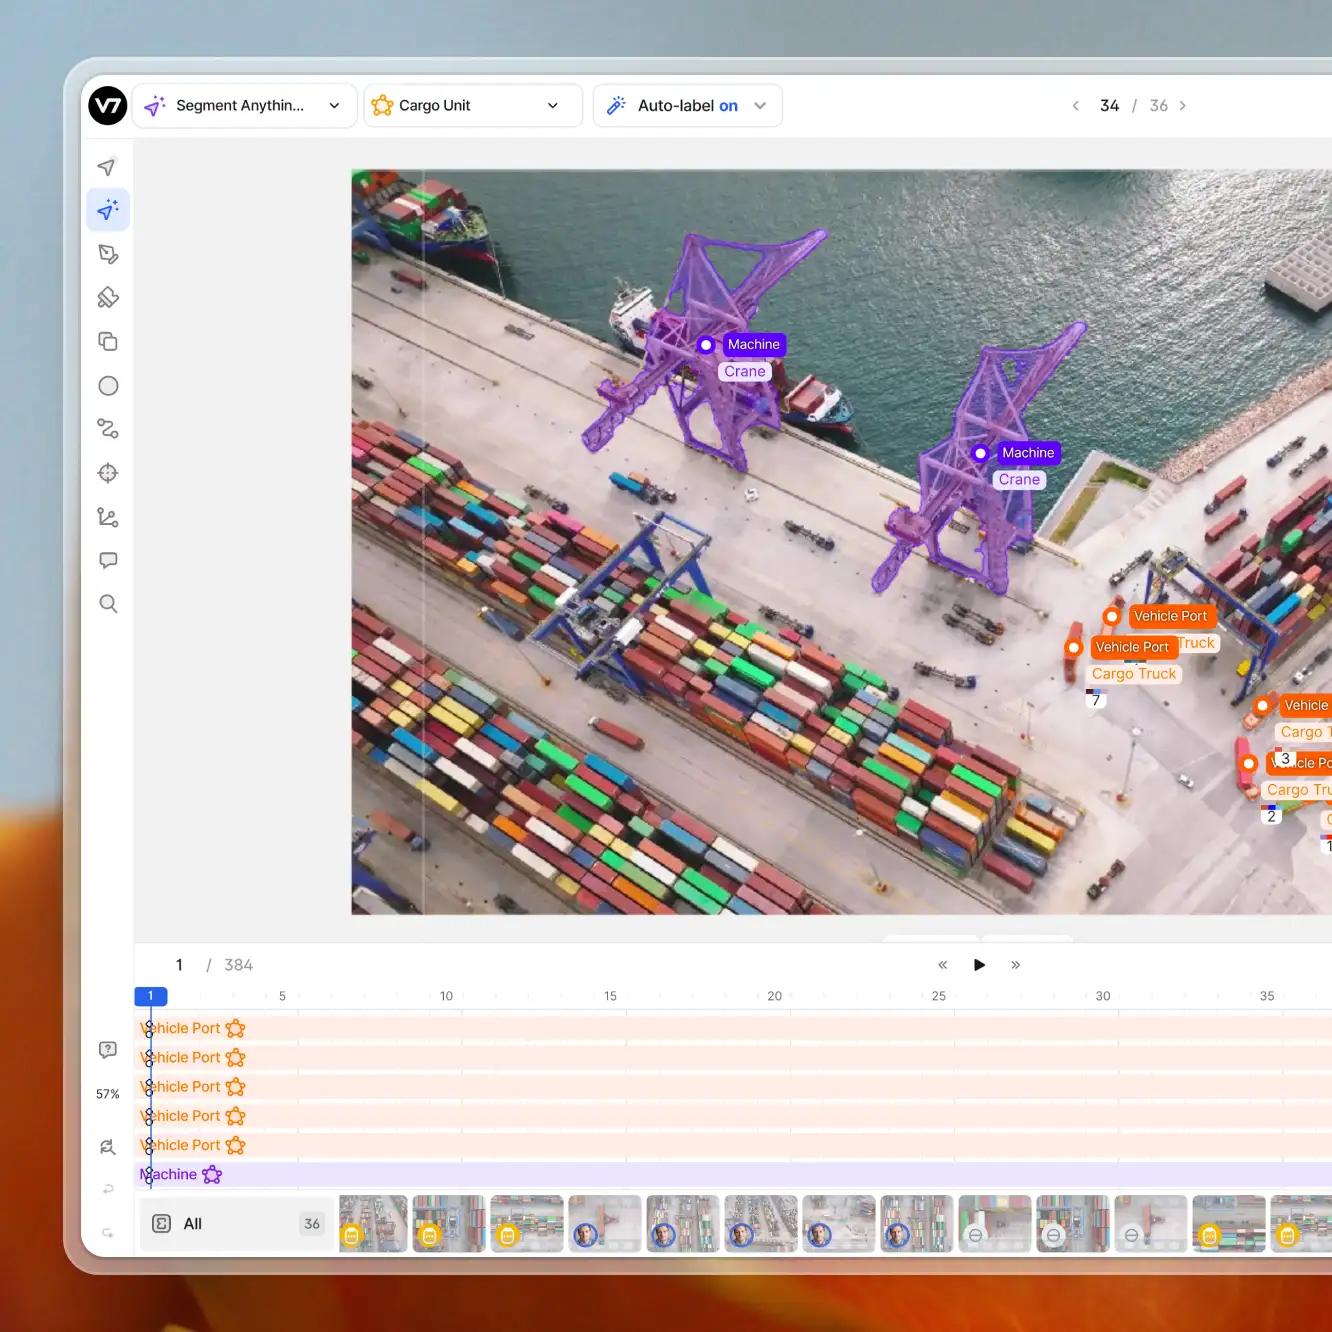
If we have a lot of video footage that we need to annotate, it may be necessary to automate the process. For example, V7's deep learning annotation platform can automatically create polygonal annotations. All you need to do is mark the video region in which the object is located and the app will generate a polygon annotation for you.
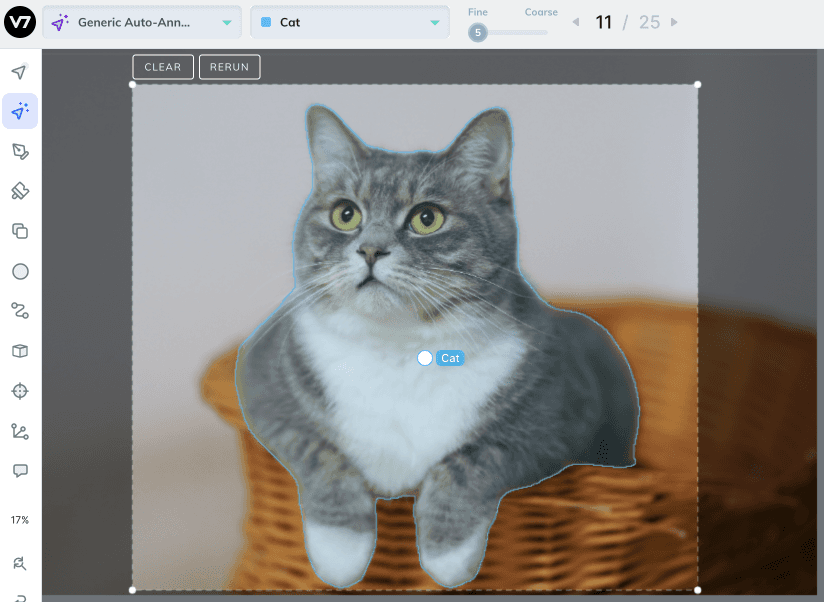
Since auto-annotation is the most convenient method, it is becoming more and more popular. This is not really too surprising, since the vast majority of all annotation tasks can be handled with just a few clicks.
So, now we can look at how exactly this works and then move on to practical applications.
Let's annotate our first video, shall we?
How to annotate videos with auto-annotations
Manual annotation of data is a tedious, repetitive and really slow process. Hence, while there are many ways to annotate video footage, the most common method is to use one of the image annotation tools that support video files.
Annotating data using AI-powered annotation tools can make the process faster, more accurate and scalable. Usually, AI annotation apps have a set of built-in features designed specifically for working with videos.
V7 is an example of annotation software that allows you to label objects in video footage.
Let’s use it to illustrate the process and explain the steps.
The steps to auto-annotate video footage for machine learning boil down to:
Uploading your footage to the annotation platform
Importing the video at the framerate of your choice
Creating a new polygon data class
Selecting your object to generate a new keyframe
Rerunning the auto-annotate tool throughout the footage
Here are the steps discussed in detail.
1. Upload your video
If you are starting a new project, you should create a new dataset. You can add your video footage with the Add Data button. The supported video file formats in V7 include .avi, .mp4, and .mov files.
You can drag and drop your video file or generate an API command if you don’t want to upload them manually.
2. Set your frame rate
Your footage will be recognized as a video automatically. A popup window will appear and you will have to specify what frame rate you want to work with. For general object detection, you can use a low frame rate of about 1-2 frames per second (FPS). Tracking movement requires higher frame rates. For reference, the standard frame rates are usually about 25-30 FPS.
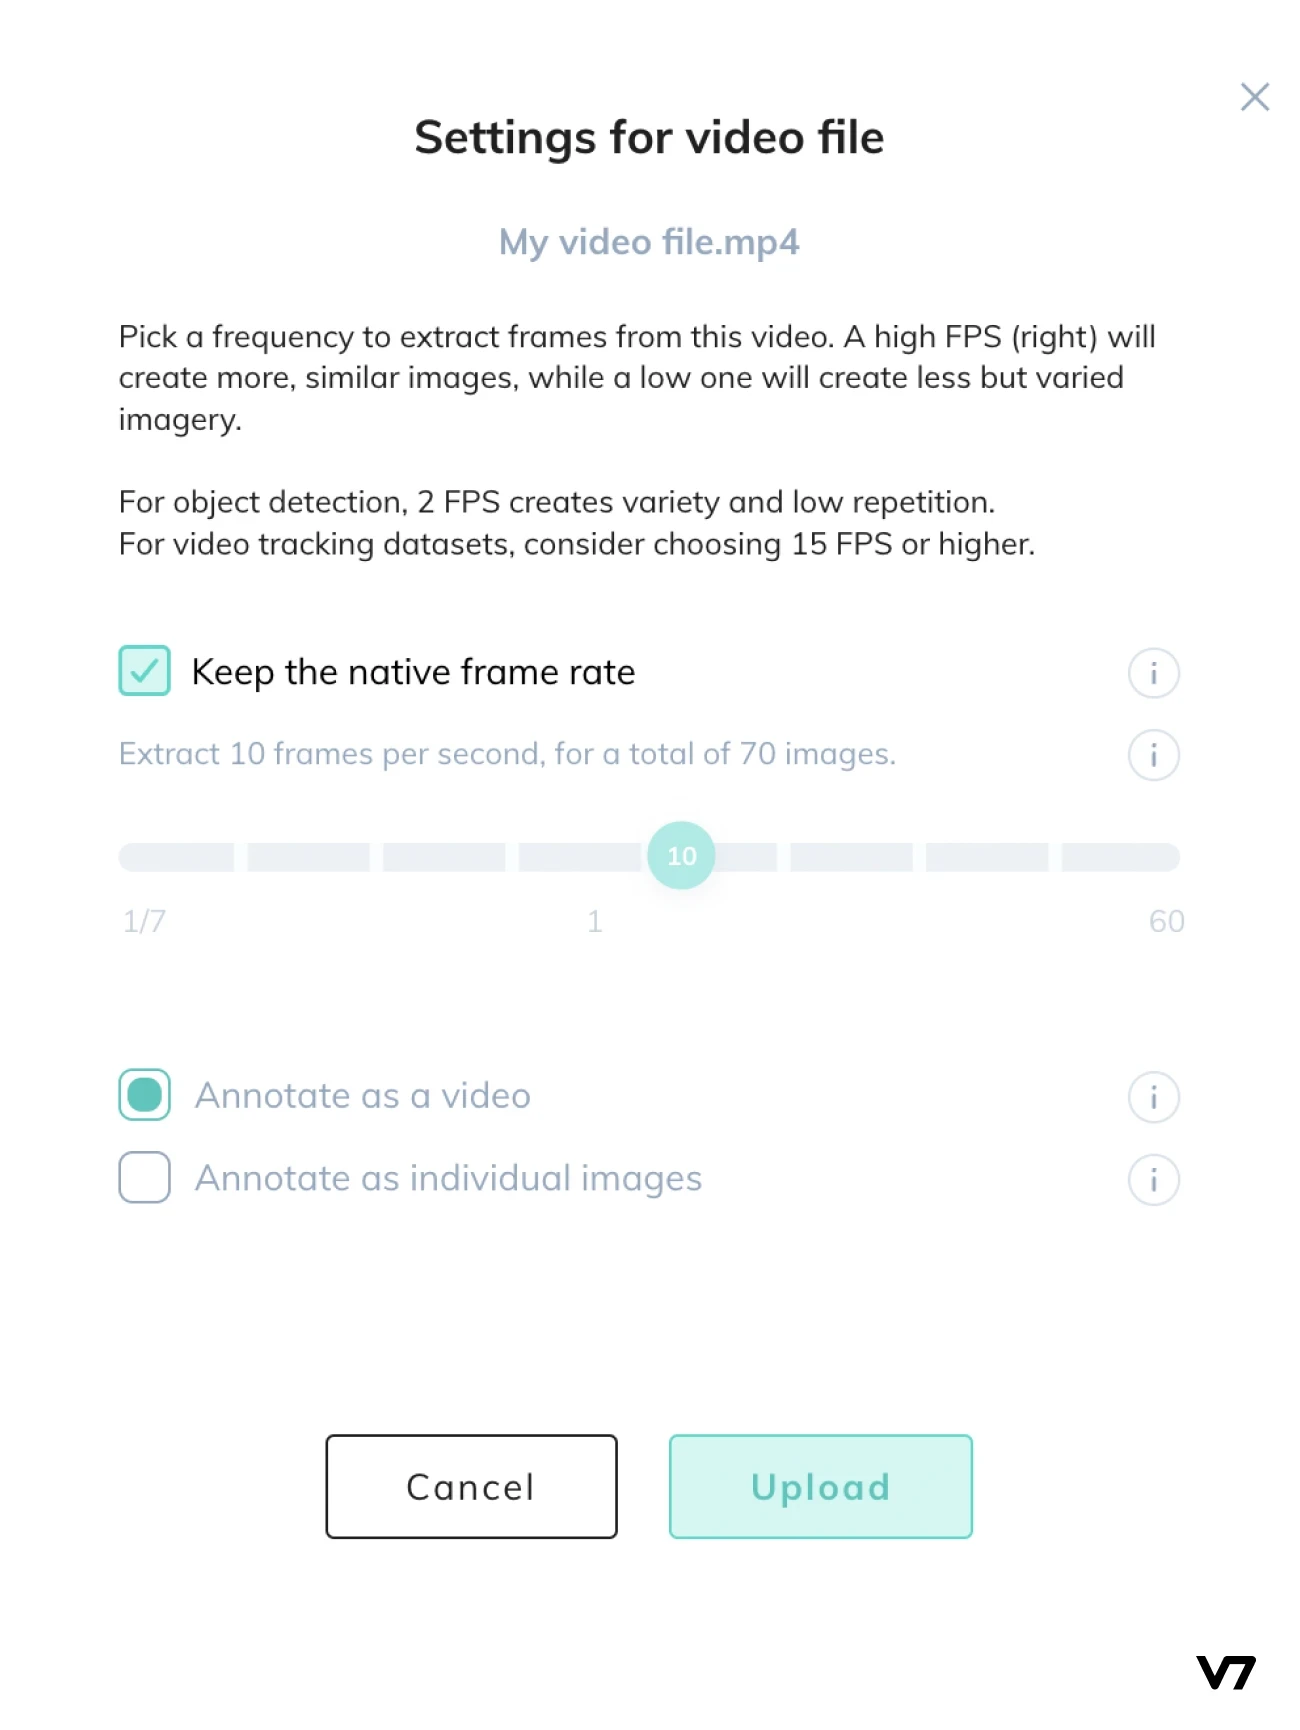
Remember—the higher the number of imported frames, the bigger the project. If your footage is short or you are not bothered by having to annotate huge amounts of frames, you can keep the native frame rate for the highest accuracy. However, in some cases reducing the amount of your training data is a more convenient choice.
3. Create a new annotation class
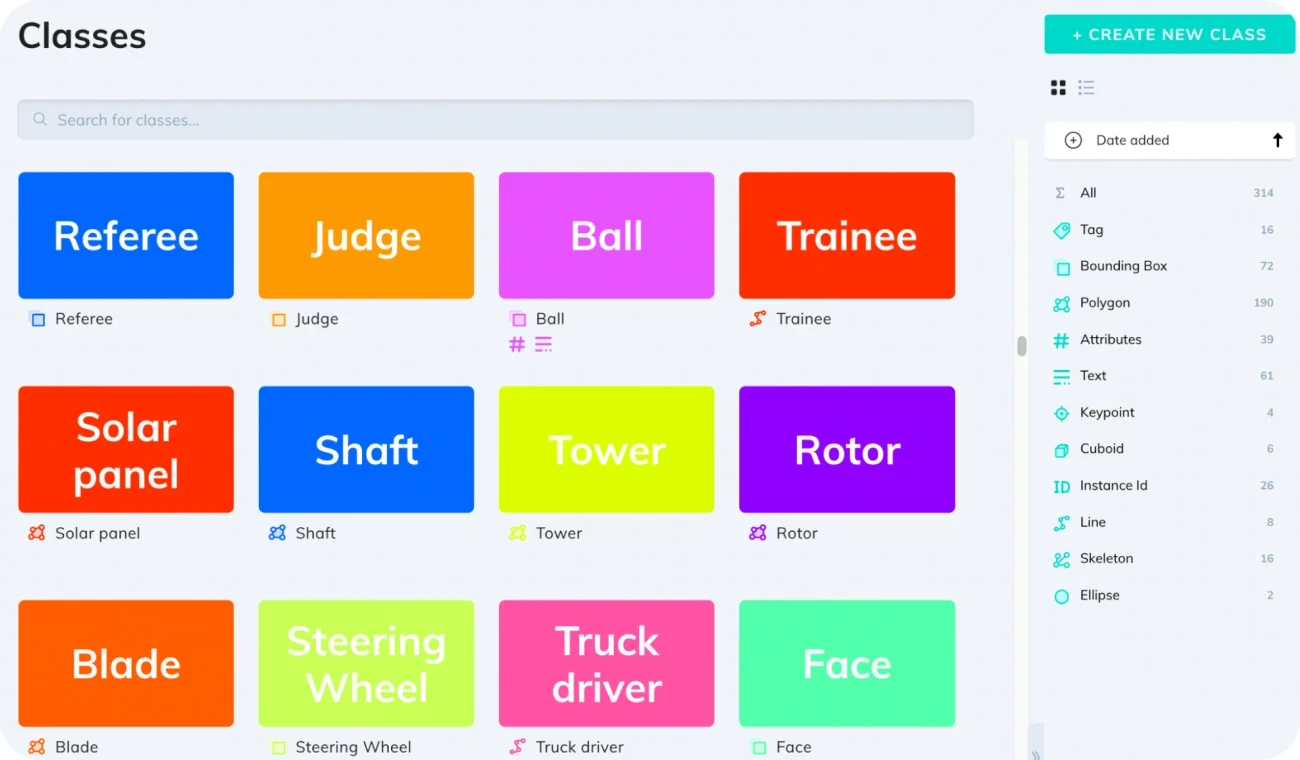
In order to annotate objects in your video, you need to create annotation classes. They are like virtual labels that we’re going to use to annotate videos. For example, we can create classes such as “Pedestrian”, “Car,” or “Bicycle” for annotating traffic footage.
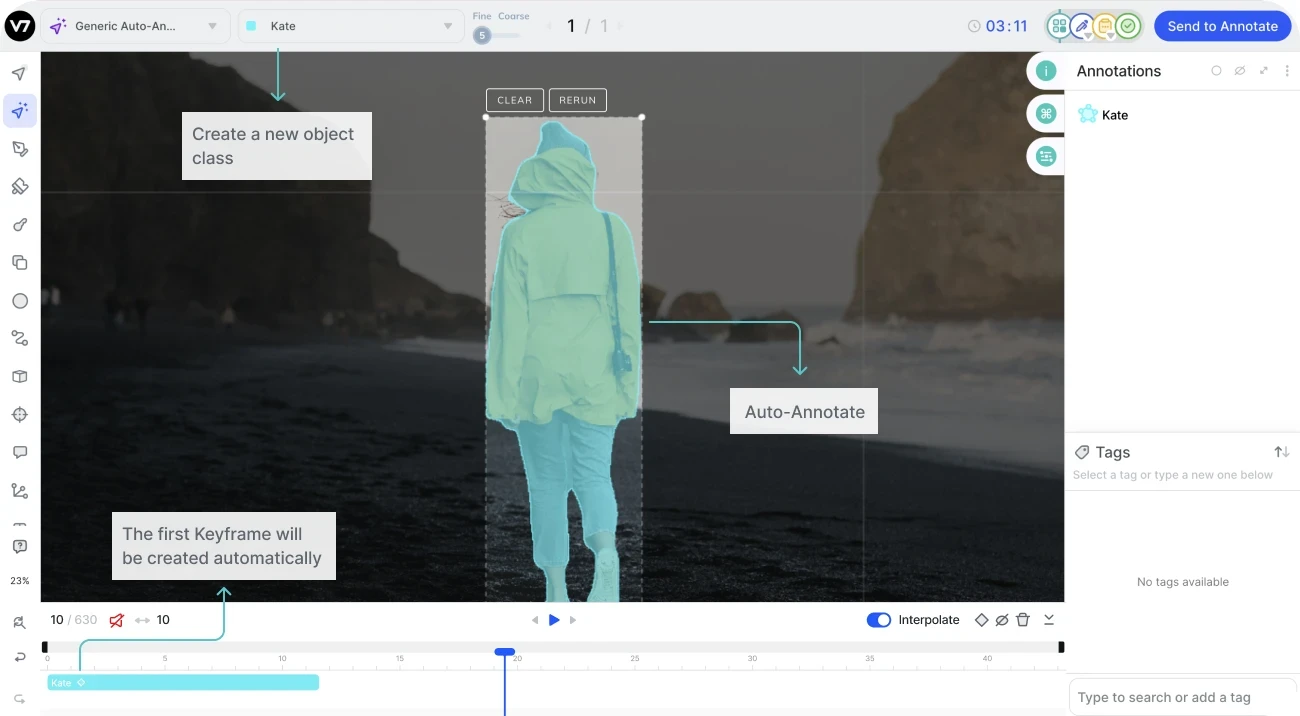
Click on the Auto-Annotate tool. A new dropdown menu will appear. Select Generic Auto-Annotate and New Polygon Class. Let’s name our class “Kate” and confirm the type of our annotation class as Polygon.

There are more classes available but the automatic video and image annotation works only with polygons.
4. Select your object with Auto-Annotate
Go to the first frame in your timeline and select the person or the object in your footage with the Auto-Annotate tool.
And this is where all the magic happens—our annotation mask is generated automatically.
When you auto-annotate the object, the silhouette should be highlighted with the color of your class and the appropriate label will appear. The annotation will also appear in your Annotations panel on the right.
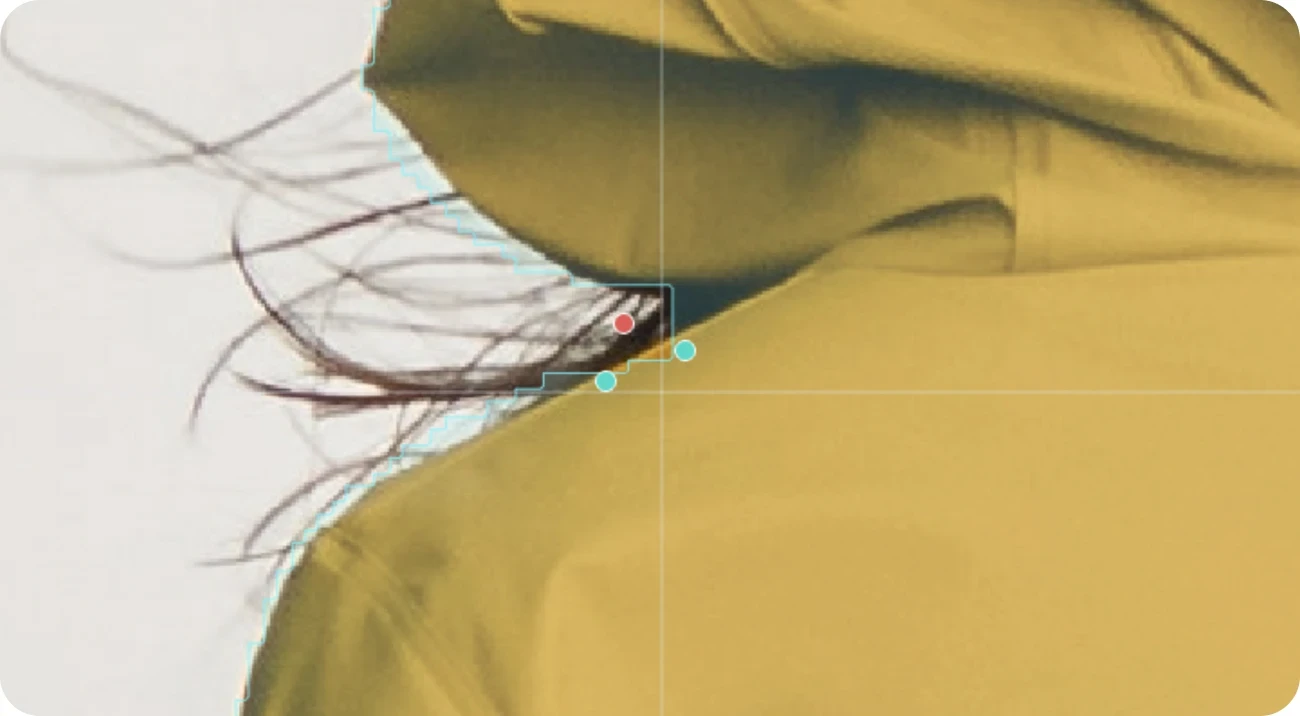
You can reduce the number of edges of your polygon mask with the Fine/Coarse parameter. A simplified annotation with fewer edges may be rougher and less accurate but also easier to process.
If you want to tweak your selection you can also add and remove areas manually. Just click on parts of the frame that you want to include or exclude.
Pretty nifty, huh?
Creating your first annotation will automatically generate a keyframe. You can think about keyframes as frames that contain the essential information. For example, in traditional animations, key animators draw only the most important frames and their assistants draw everything that happens between the keyframes. In a similar fashion, you can annotate only some of the frames in your video and create automatic interpolations between them.
5. Rerun the Auto-Annotate across your video to create more keyframes
The standard procedure now is to jump several frames, adjust your general selection if necessary, and click the Rerun button. It will transform the polygon and adjust it for the changes and motion that occurred in your video.
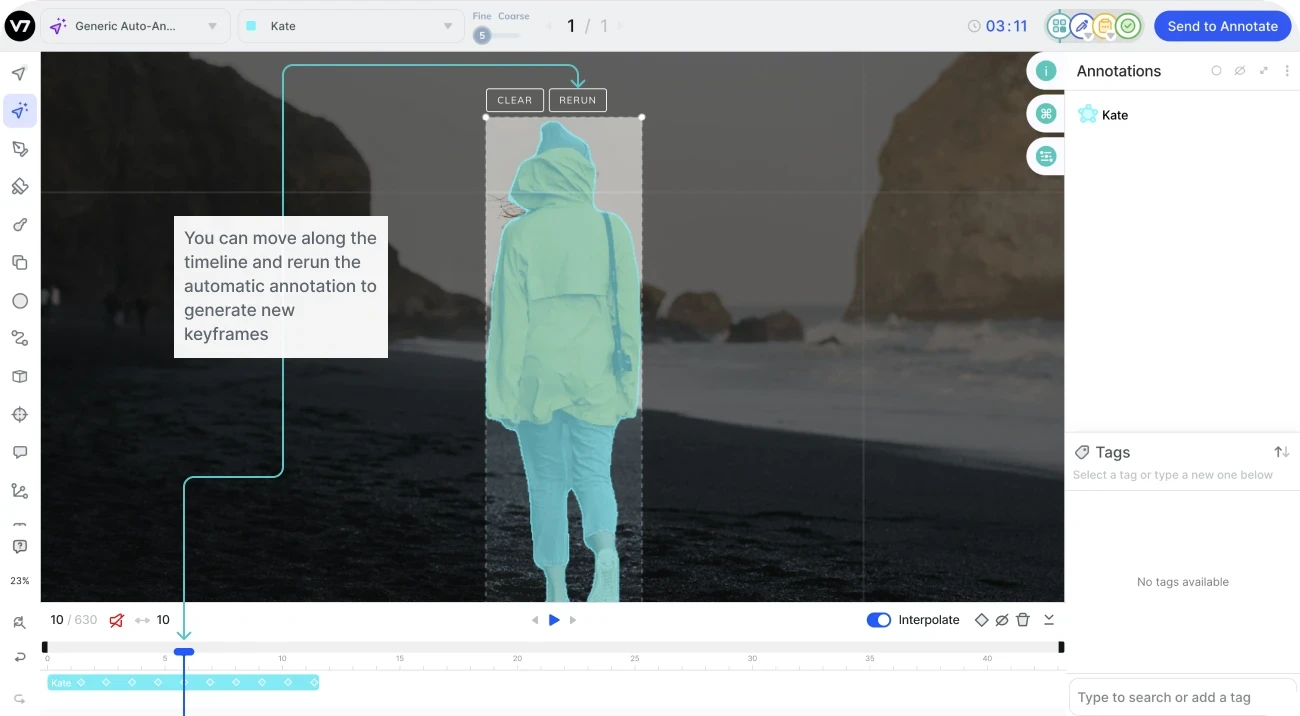
Every time you recalculate your polygon, a new keyframe will appear in your timeline. They are marked with the white diamonds. You can remove keyframes or add new ones to make your annotations more accurate.
If you want to learn more, read about using the auto-annotation feature in V7 here.
How to annotate a video with bounding boxes and keypoint skeletons
While auto-annotating videos is extremely useful, in some cases it is an overkill. Many AI models rely on simple bounding boxes or keypoint skeletons. These are also quite easy, although sometimes they require more manual adjustments.
Let’s give it another try and annotate another video, this time with a keypoint skeleton and a bounding box.
1. Import your video and set the frame rate
The first part of the process is the same as before. You need to upload your source footage and decide how many frames per second you want. This part is the same as the steps 1-2 above[#link].
2. Create new annotation classes
This time we need a keypoint skeleton. Pick Skeleton from the toolbar on the left. Add a new class, choose the Skeleton type, and scroll down to the skeleton editor. You need to create a stick figure representing a human being.
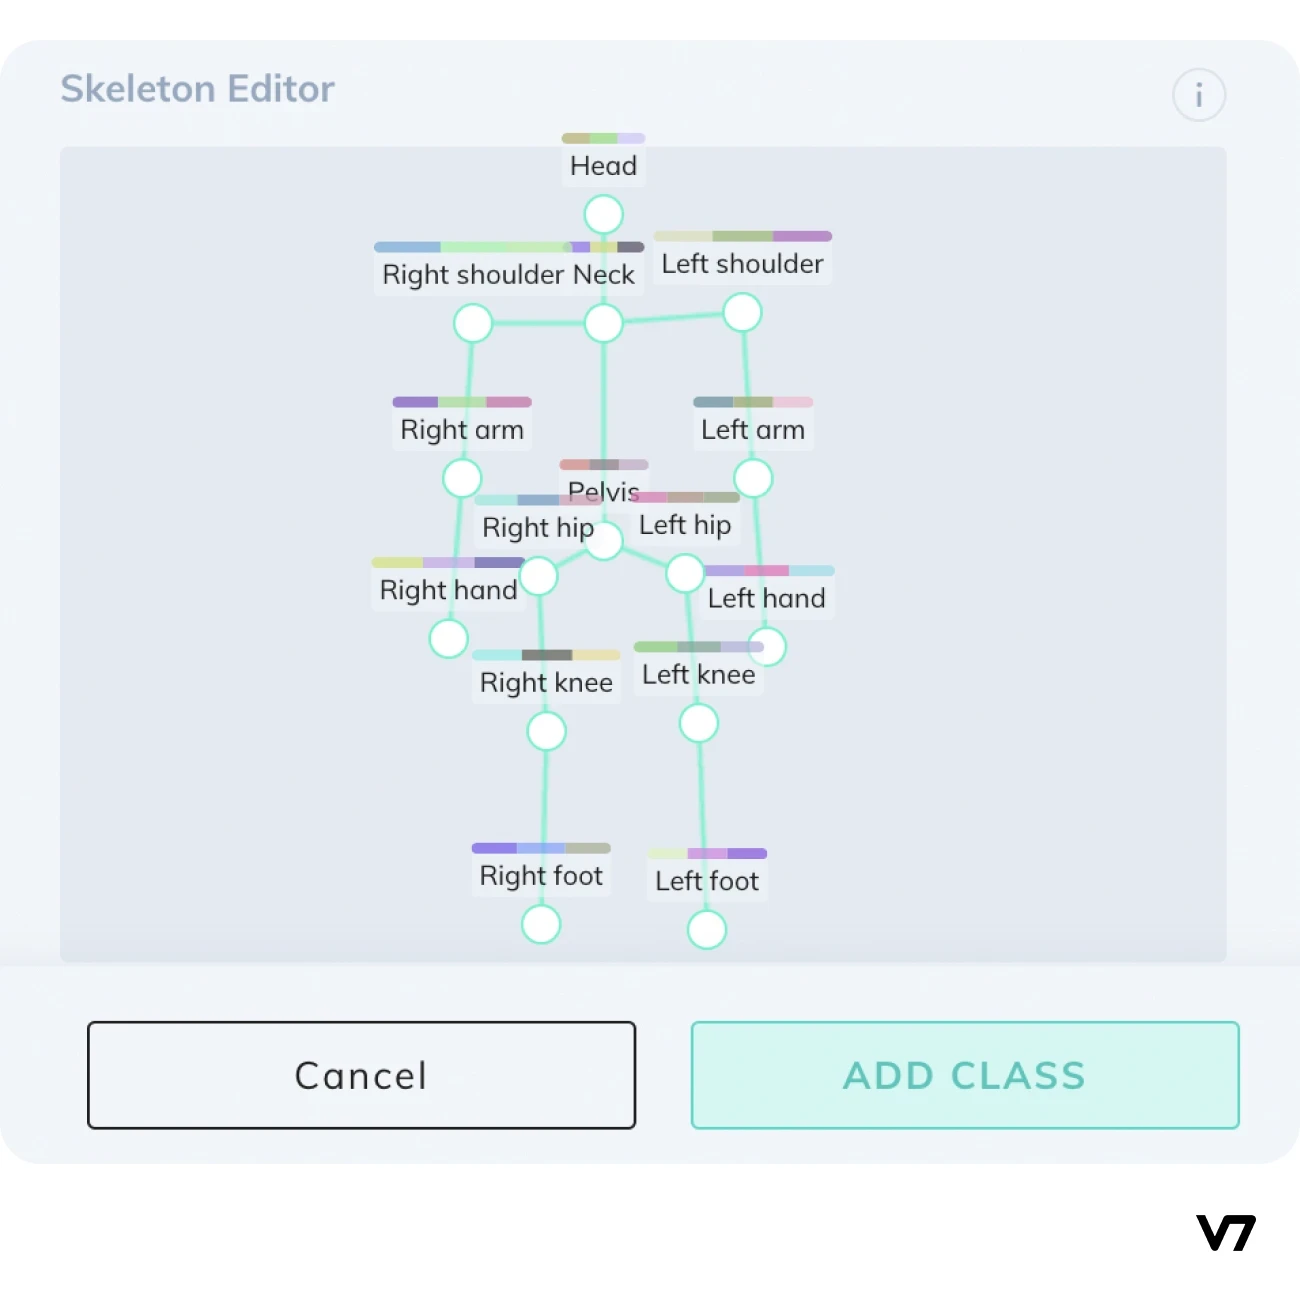
You can build your skeleton by adding points with unique IDs and linking them together. Once you are done, you can add the skeleton and use it as your annotation class. In our example, the name of the skeleton class is “Keypoint player.” We also created a new bounding box class for the hockey net.
3. Annotate the objects of interest in the video
To annotate the player just add the newly created skeleton on the frame with the Skeleton tool. You can reposition its joints to match the pose of the player by clicking on specific nodes.
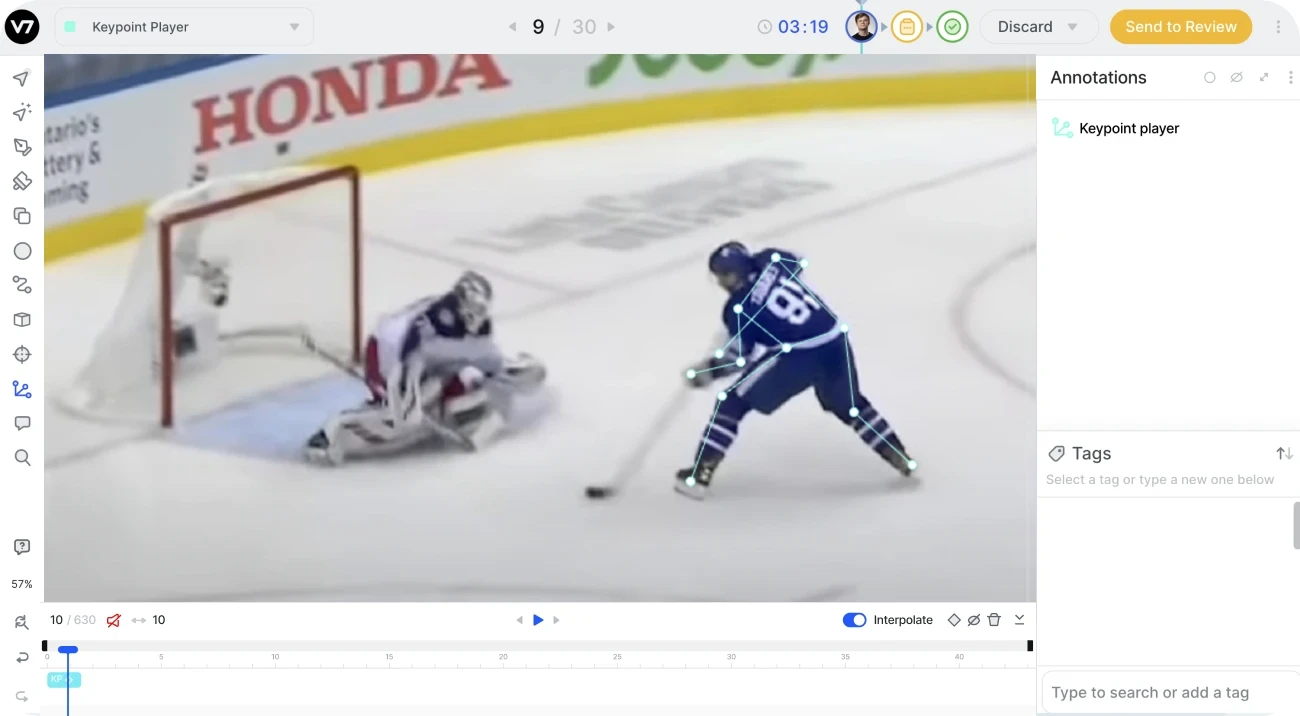
If some parts of the body are hidden it is best to remove these points from your skeleton. In our example, the right hand of the hockey player is occluded. You may remove this keypoint by selecting it and clicking backspace.
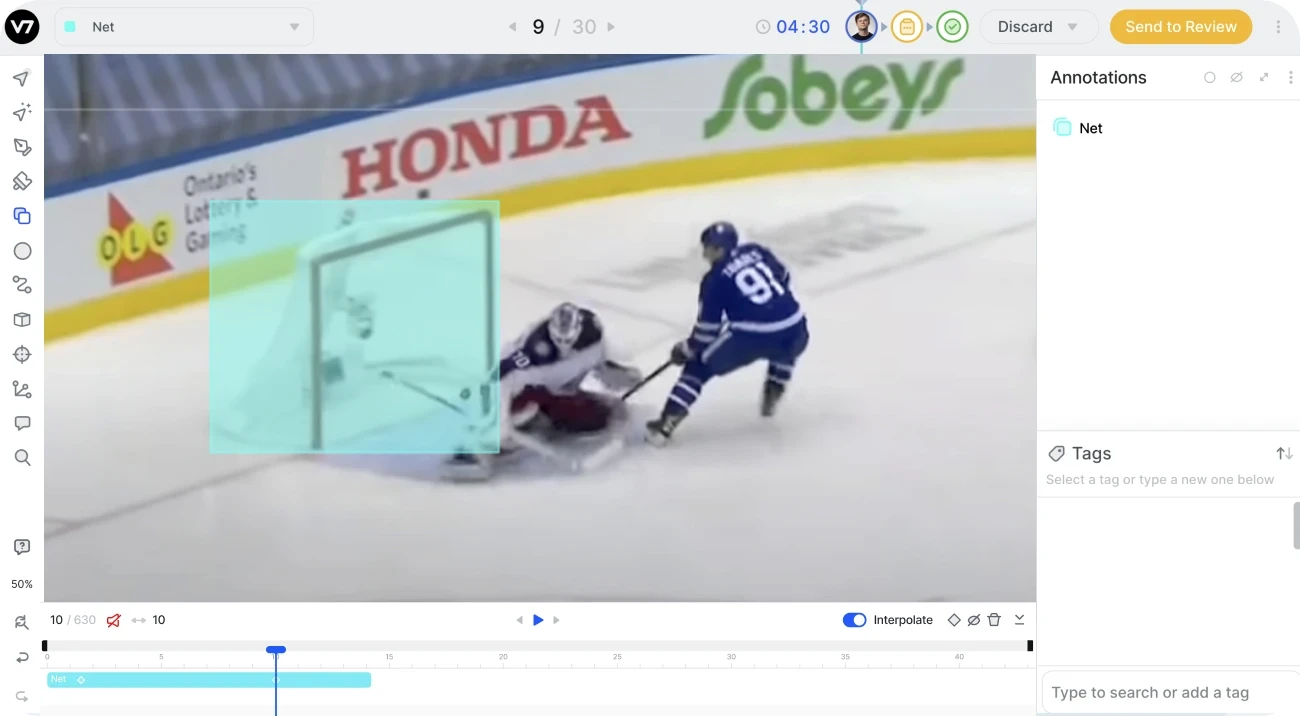
To annotate the net with the bounding box choose Bounding Box Tool from the toolbar. You can adjust the size of your box annotation by clicking on the relevant area of the frame.
4. Move forward a few frames and edit the annotation
Use the timeline to navigate between the frames. When the position of the player in the frame changes, readjust the skeleton. This will generate new keyframes. Play the video to double-check if the interpolation between keyframes is accurate and smooth. If some fragments of your video are mismatched, add more in-between keyframes.
Keep adding keyframes every 2-5 frames until the whole video is annotated correctly.
Sounds easy enough, doesn’t it?
Annotating videos requires patience and practice. But here are some additional tips that will help you get started.
Best practices for video annotation and labeling
You need to label your video data correctly if you want to use it for training your AI models. Working with masks and polygons is the crucial step that should not be overlooked. But there are some other things to keep in mind when annotating video data for AI training.
So, how to make good annotations?
Here are some tips for video annotators who want to train their computer vision models.
1. Pay close attention to the quality of the recording
Sometimes you won't have control over the quality of the content. But you should make sure you don't make it even worse. Some annotation tools can worsen video quality. Make sure your video annotation software uses lossless frame compression.
When it comes to AI training data, every pixel matters. If possible, avoid recording video footage in low light conditions. Image noise makes the auto-annotation feature more prone to errors. And you don't want to annotate low-quality videos manually, right?
2. Keep your datasets and classes organized
Good workflow applies to everything, and AI training is no exception. Pay attention to how you name your files, classes and libraries. As luck would have it, V7 is very user-friendly when it comes to asset management. You can add descriptions and tags to your classes and datasets.
Make sure to label each class with a unique ID. You can also change their colors—you can use this feature to your advantage. Just make sure to use consistent naming conventions and labeling schemes for all your data.
3. Z-stacking can help you deal with overlapping objects
At some point, you will probably have to work with complex scenes. That means tricky backgrounds and overlapping objects. To deal with them, you have to learn how to manage different layers and their order.
Thankfully, video annotation tools make working with layers quite intuitive. In V7 the list of annotations is on the right side of the panel and their arrangement corresponds with the Z-axis order. You can jump between layers by pressing SHIFT + ] and SHIFT + [.
4. Learn how to use interpolation and keyframes
Sometimes, you will be tracking objects that don’t change their shape and move in a predictable way. It may turn out that two keyframes are enough for creating a pixel-perfect interpolation and annotation—
And sometimes you'll have to fiddle with every single frame manually.
The sooner you learn to tell the difference between these situations, the better. It is a good practice to watch the whole footage and plan your approach before you start annotating.
5. Use automatic video labeling to save time
If your annotation software offers auto-annotation features, use them. Auto-annotation can help you label objects in your video quickly and efficiently. They are real time-savers.
Even when the auto-generated annotation masks are imperfect and require some manual adjustment, it may still be worth it. In the long run it beats having to do everything from scratch. Building your polygon masks point by point takes ages.
6. Import shorter videos to increase performance
Most likely, you are going to use a web-based annotation app. And long videos can be heavy to load on any browser. For the fastest performance possible, it is best to split large video files into smaller ones. Always try to prepare a set of short video files of 1000-3000 frames each as a pre-processing step. This means that, as a rule of thumb, your individual videos shouldn’t be longer than a minute.
Key takeaway
Video annotation may sound complicated but there is nothing to be afraid of. Once you've mastered the basic techniques, it's all smooth sailing.
Computer vision technology powered by AI is very promising. Especially in healthcare, automotive industry, and security, where artificial intelligence models can detect and analyze patterns and anomalies in large data sets. Obviously, they still need a little help from their human friends. But, with the use of new tools, annotation can be done by any person with some training.
Here are some things to keep in mind:
Annotation is the process of adding labels and tags to data
Video annotation for AI involves adding labels to video data to prepare datasets for training machine learning models
The most common annotation masks are bounding boxes, polygons, keypoints, keypoint skeletons, and 3D cuboids
Annotating data with professional tools can make the process faster, more accurate and scalable
Keep your data organized and choose the right annotation techniques for different types of footage
If you feel that you are ready to start working on your video annotation right now, you can test-drive the V7 Darwin tool.