Playbooks
How to Annotate Long Videos in V7
6 min read
—
Oct 24, 2023
V7 can now handle video files that are 10x longer, and with 700x more annotations! We've updated our annotation interface and backend video processing to make working with video datasets more intuitive, faster, and flexible.

Content Creator
From surgical videos to autonomous checkouts, video footage is one of the best types of training data for developing AI models. Videos provide more data points and the temporal context necessary for computer vision tasks, such as movement tracking.
As part of a widespread overhaul, you can now work with videos in V7 which are an hour in length – and beyond.
To put this in numbers, videos in V7 can now be 10x longer, support 700x more annotations, and come with a redesigned user interface to make annotation more efficient.
Our latest update focuses on three key areas:
Video length and quality
Total annotations
User interface
⚠️ Long video support is currently behind a feature flag and is being rolled out for beta users. If you are interested in trying it out, reach out to bill@v7labs.com and CC your CSM.
What are the main differences?
Labeling large, densely annotated video files used to involve splitting them into shorter clips or, even worse, labeling on individual images that represented frames. Our new approach is more in line with Youtube/Netflix, which dynamically extracts frames on the fly.
As a result, this update allows you to work with longer video files without the need to break them down into clips. With the standard video frame rate of 24 frames per second, V7 can now handle videos up to and beyond an hour in length while annotating them at their native frame rate. For use cases that typically employ reduced frame rates, such as surveillance footage, we can now utilize 24-hour clips as single files(!) in our dataset by reducing the frame annotation rate to 1 FPS. Additionally, this has brought in a reduction of storage costs in the region of 9-10X.
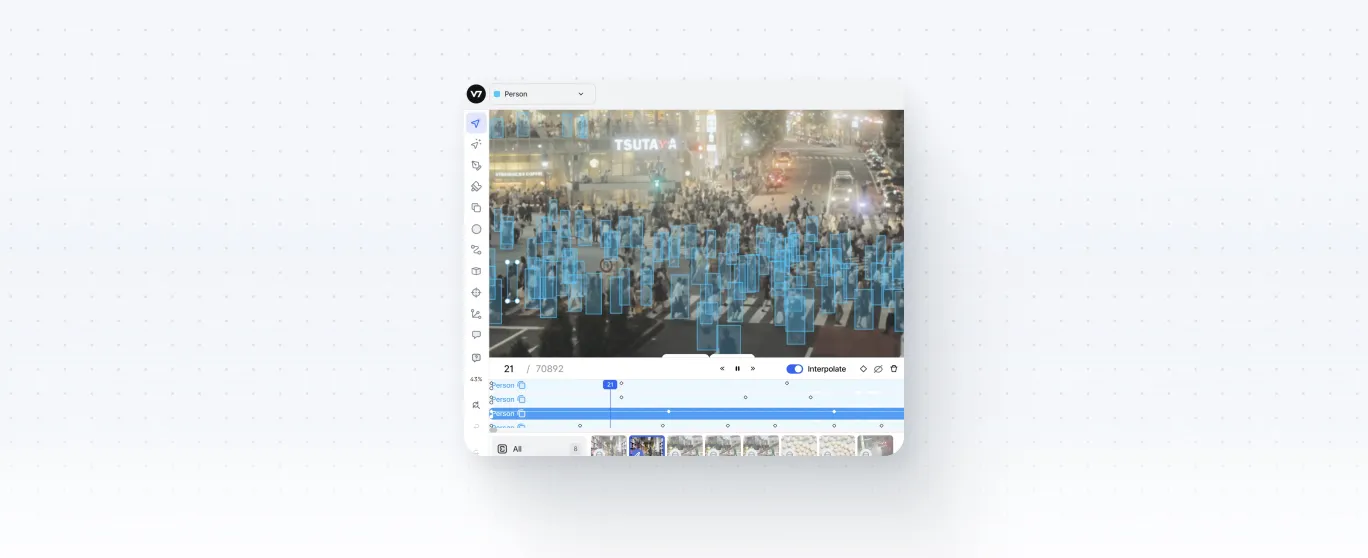
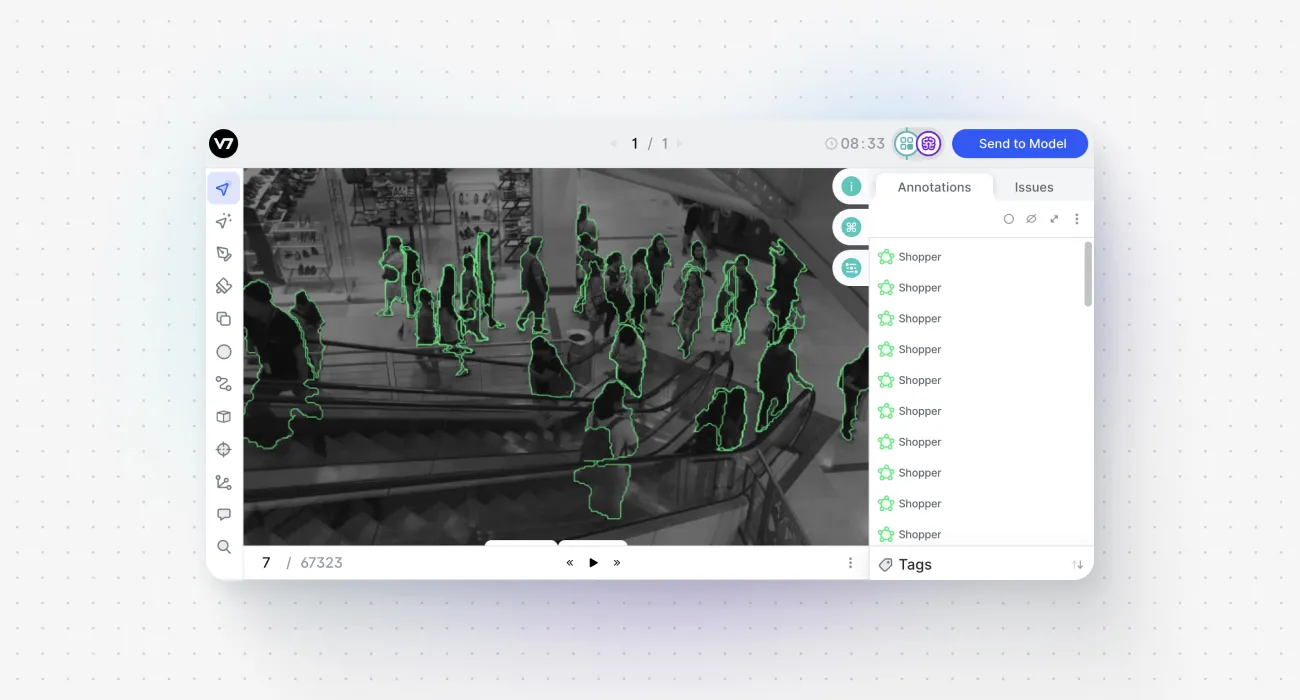
This footage has been imported and annotated at the default speed of 1FPS but it can still be previewed at its native frame rate.
The best part? You can still preview the whole footage at its native frame rate inside the annotation panel. The FPS parameter refers to annotation frequency and primarily affects the timeline behavior, without reducing the actual frame rate of the video itself.
Because everything is now processed dynamically in real time, the overall performance boost allows for more annotations to be added to the timeline too. After the update, V7 can store up to 700K annotations and 6 million keyframes per video.
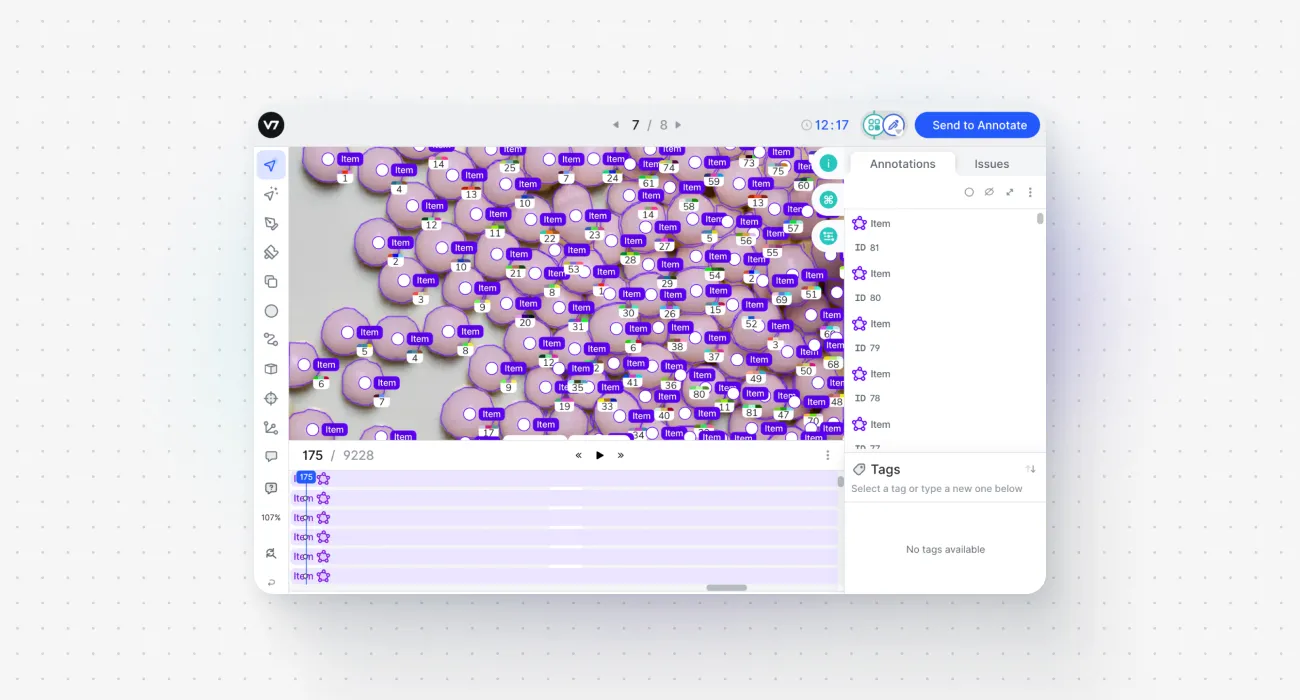
The interface and the playhead itself have been redesigned to indicate your current annotation frame in the video. The timeline also distinguishes between processed and unloaded frames, which is indicated by different shading. You can still utilize features such as zooming in and out, setting the default annotation length, or interpolation for creating automatic annotations between keyframes.
The Godfather (1972), with a runtime of nearly 3 hours, ranks among the longest classic gangster films. With our latest long video update, you can now import it to V7 as a single clip. It is possible to work with the native frame rate while still using SAM, V7 models, or other auto-annotation tools.
How to annotate long videos
The general process remains the same as with regular videos. However, there are some additional considerations discussed below, so let's review the standard setup and flow step by step to address them.
Step 1. Upload your video files
Go to the Datasets panel and create a new dataset. Drag and drop your video files. The supported video formats are .avi, mkv, .mov, and .mp4. You should see a popup window asking you to specify annotation frequency.
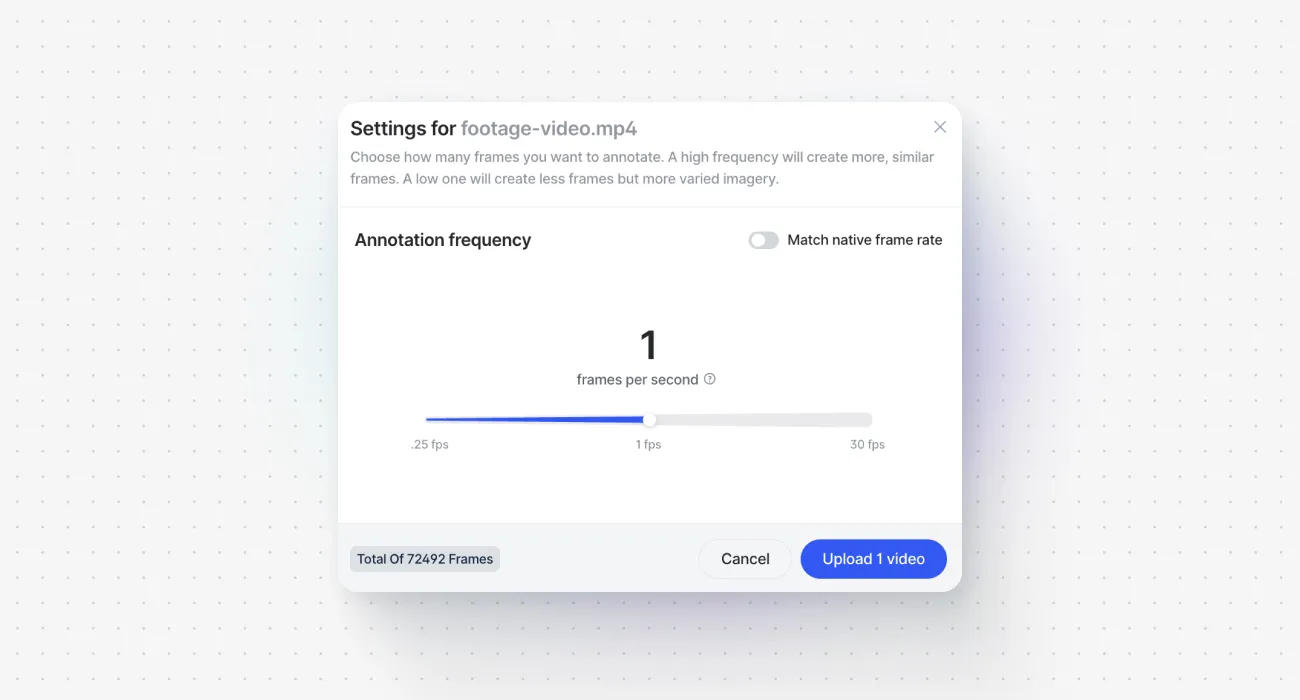
As was mentioned earlier, this parameter does not reduce the FPS rate of the underlying/source video file, but changes how the duration of your video clip is mapped onto the timeline. This parameter corresponds to how many frames are available for adding annotations.
Step 2. Create your annotation classes and set up your workflow
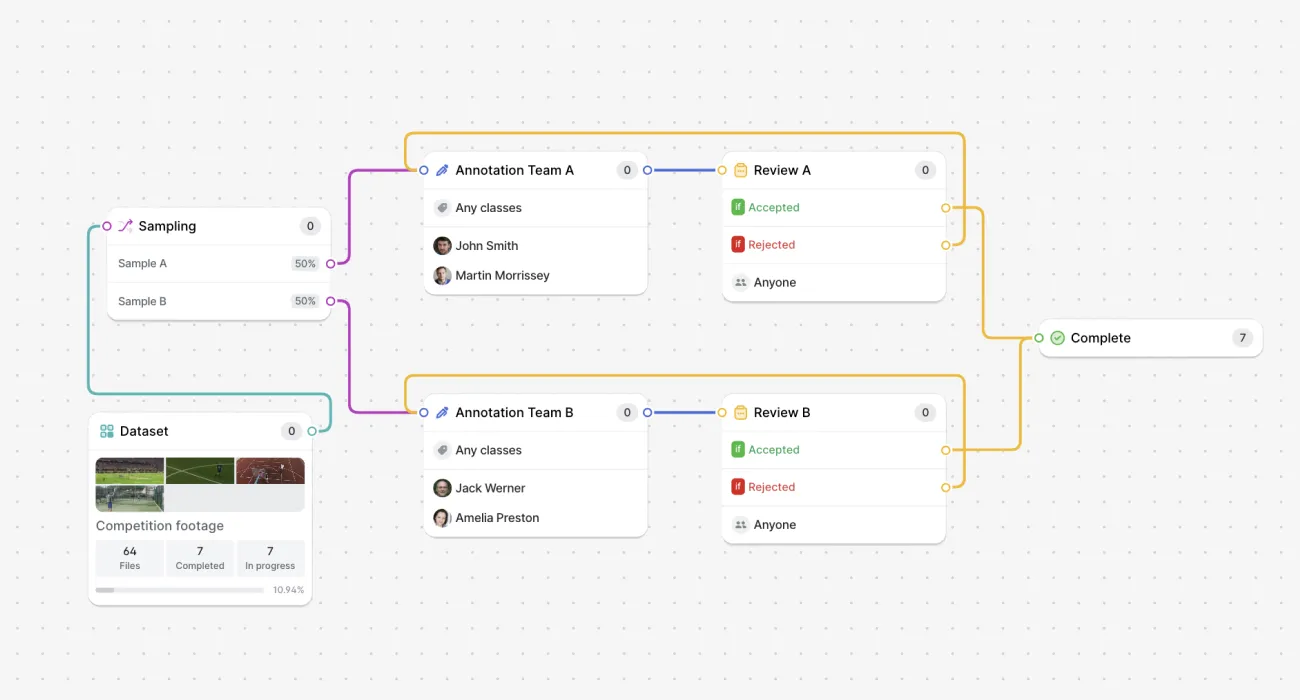
The majority of video projects in computer vision use tags, bounding boxes, or segmentation masks based on either polygons or pixels. If you want to label your videos manually for a new use case or a scenario when working with a single video is a laborious task, you may want to split the work across multiple teams of annotators. This can be achieved by assigning annotation tasks to specific users or automated with workflow design (for example, with sampling stages).
Step 4. Use AI annotation tools to speed up your work
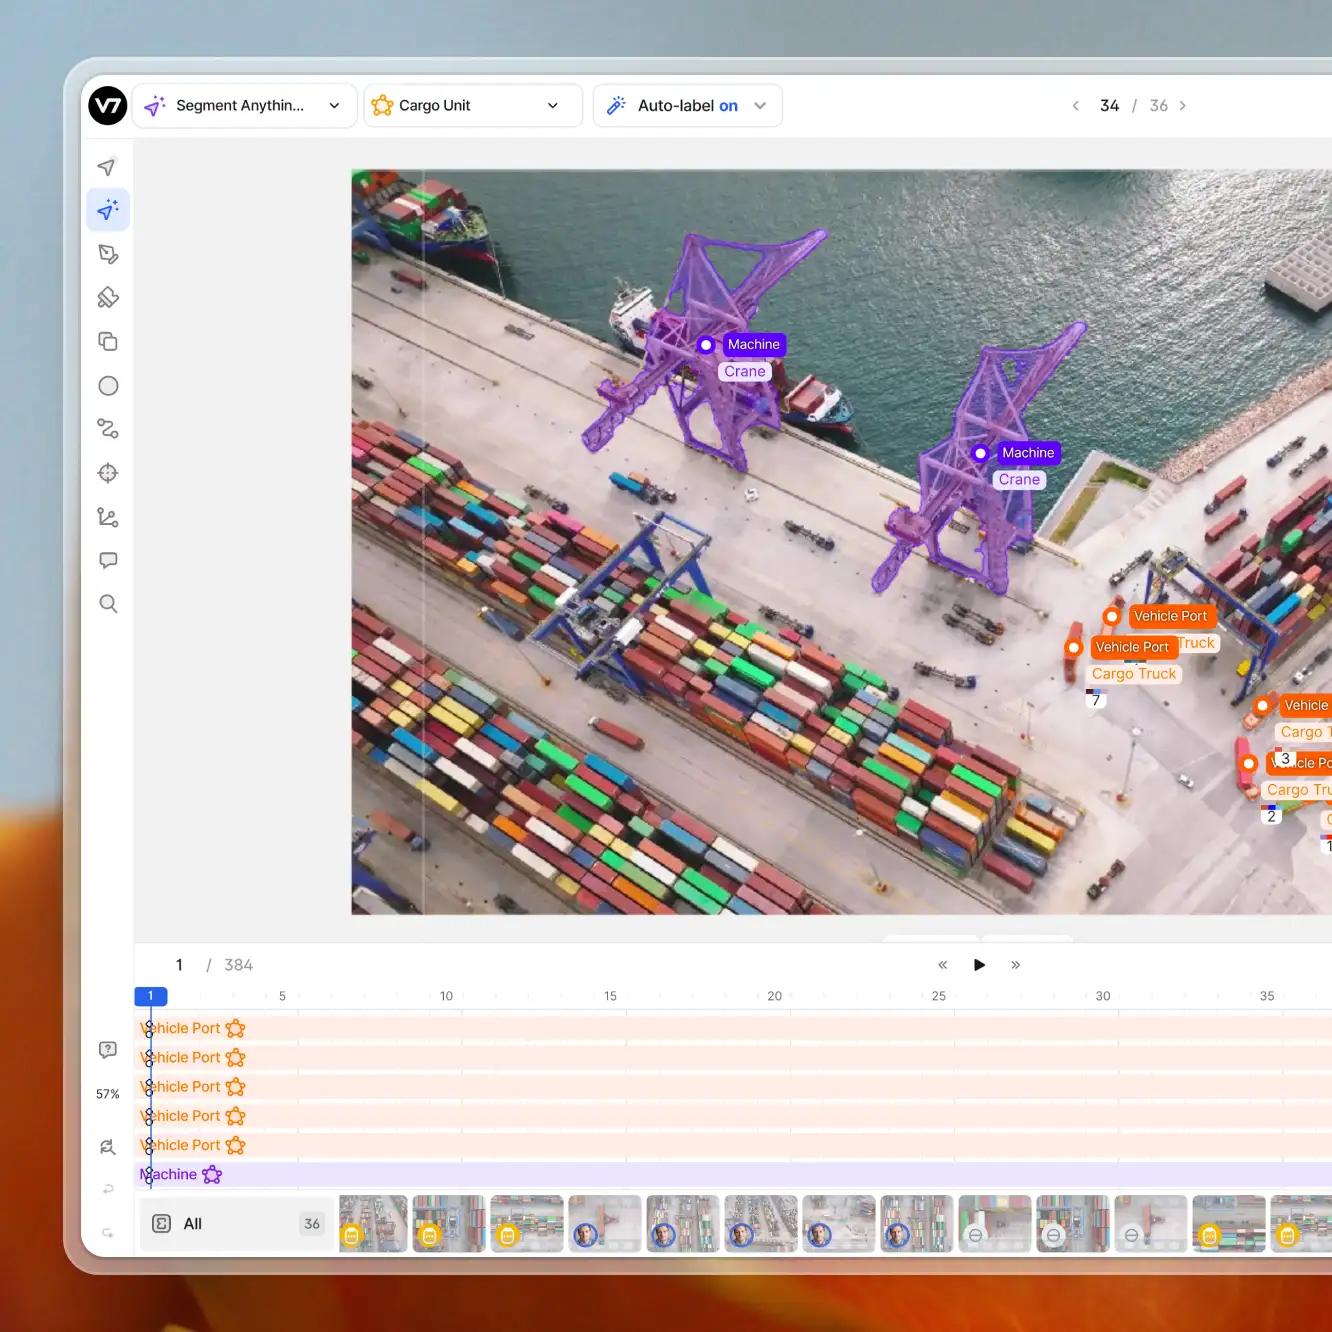
You can significantly improve your annotation efficiency by using the Auto-Annotate tool, SAM, or external models. There are many computer vision tasks that can be solved with open-source models or public models available inside V7 out of the box. It is possible to pre-label your footage with AI and then improve the quality of your annotations by adding additional properties or attributes to labels generated with AI.
Step 5. Review your annotations and export the results
V7 allows you to complete annotation projects in a collaborative manner, give feedback to annotators and set up QA processes. If you want to prioritize the quality of your training data, consider including one or multiple review stages. Once a file passes through the final review stage, you can export a Darwin JSON file with corresponding annotations.
⚠️ For long videos, you should always use Darwin JSON 2.1 format when exporting your data. You can find out more about the structure of V7’s native annotation format in our documentation pages.
Use cases
Surveillance footage analysis & PPE detection. Security surveillance is a critical application for computer vision. V7's capacity to handle extended videos streamlines the analysis of lengthy surveillance footage or security feeds in dangerous work environments. With reduced frame rate you can now import videos with ease and use months of video feeds as your training data.
Sports analytics with pose estimation. V7's enhanced timeline still offers features like interpolation for automatic in-between frame labeling, ideal for sports analytics with keypoint skeletons. Whether it's martial arts, tennis, or baseball, V7's new timeline simplifies working with pose estimation, ensuring precise insights for athletic performance analysis.
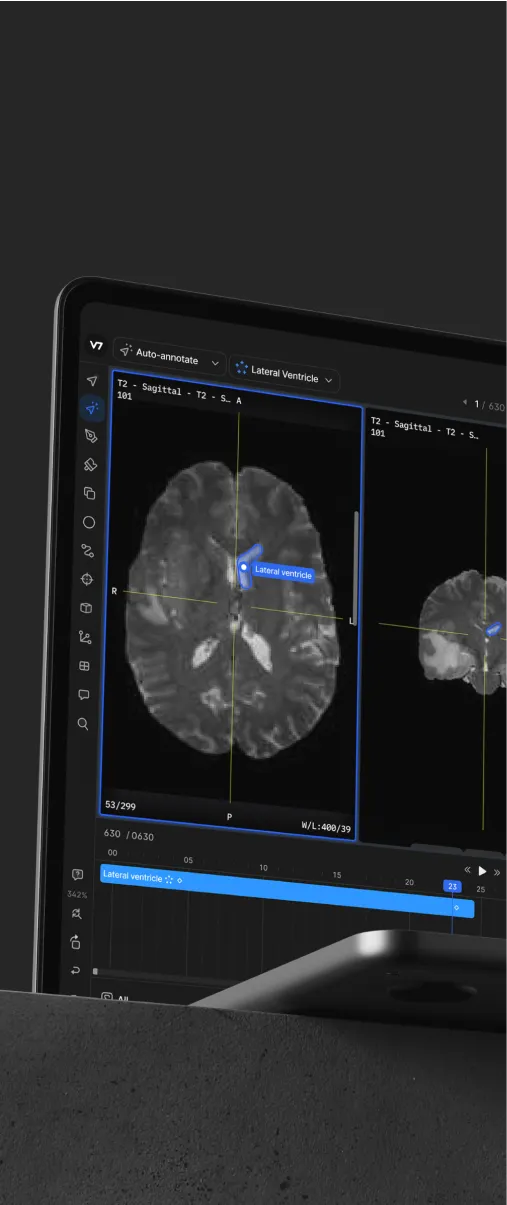
Surgical procedure recognition and instrument tracking. The updated video functionalities make V7 a perfect platform for medical labeling and research. Even with multiple organs and objects annotated in the video, you can still use the video timeline without performance breaks.
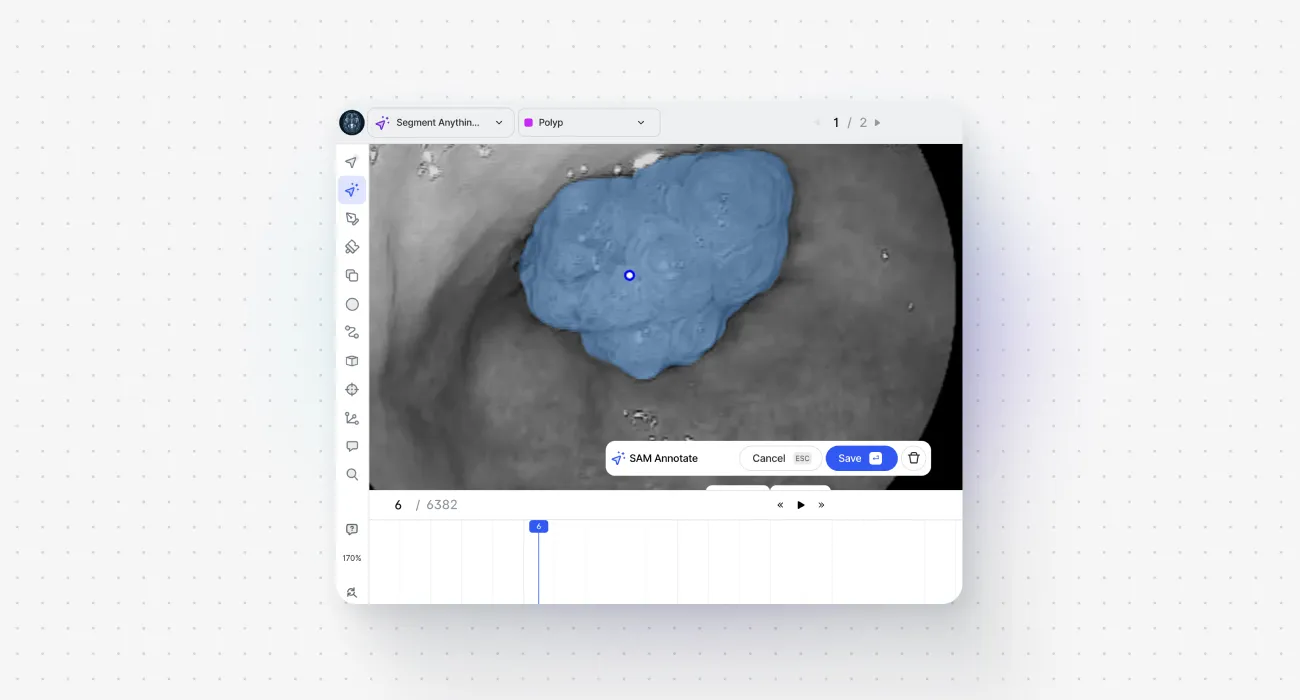
An example of polyp segmentation in a surgical navigation video
As you can see, the update offers many new improvements for different industries, ranging from autonomous driving to healthcare. However, there are still some limitations to consider. For example, if we want to track multiple objects, with annotations morphing in every single frame, it is best to keep it below 24 parallel keyframes per frame for optimal performance. You can work with higher numbers, but at some point, you will only be able to use the timeline manually to change frames without being able to play the video smoothly.
The extended video length, improved performance for high numbers of annotations, and smoother timeline navigation translate to improved dataset accuracy and throughput. Incorporate these advanced video functionalities into your workflow today and unlock the true potential of video annotation for AI. If you haven't created your V7 account yet, now is the perfect time to get started.
