Playbooks
How to Do Voxel Annotations in V7
4 min read
—
Sep 20, 2023
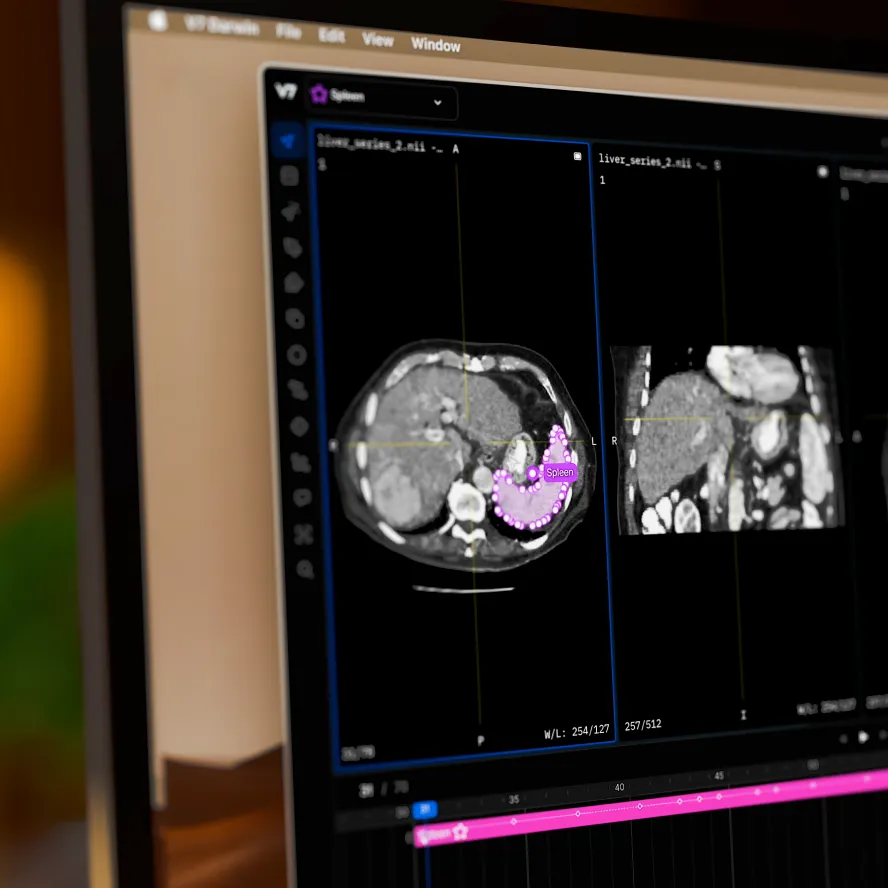
V7 now allows you to seamlessly integrate volumetric masks, enabling detailed 3D reconstructions of regions of interest. With the capability to adjust voxels from any perspective, you can achieve unmatched consistency and precision in your annotations.

Content Creator
In our latest update, V7 introduces the power of volumetric pixels, revolutionizing the way you create and modify semantic masks in 3D. Draw pixel masks from one perspective, and watch as they seamlessly appear in other projections.
This enhancement is a game-changer for medical imaging, offering a more intuitive approach to pinpointing orientation points and landmarks. Plus, with the added flexibility of the Crosshairs, Brush Tool and Eraser, refining your annotations has never been easier. This feature is especially beneficial for medical professionals working with CT and MRI scans.
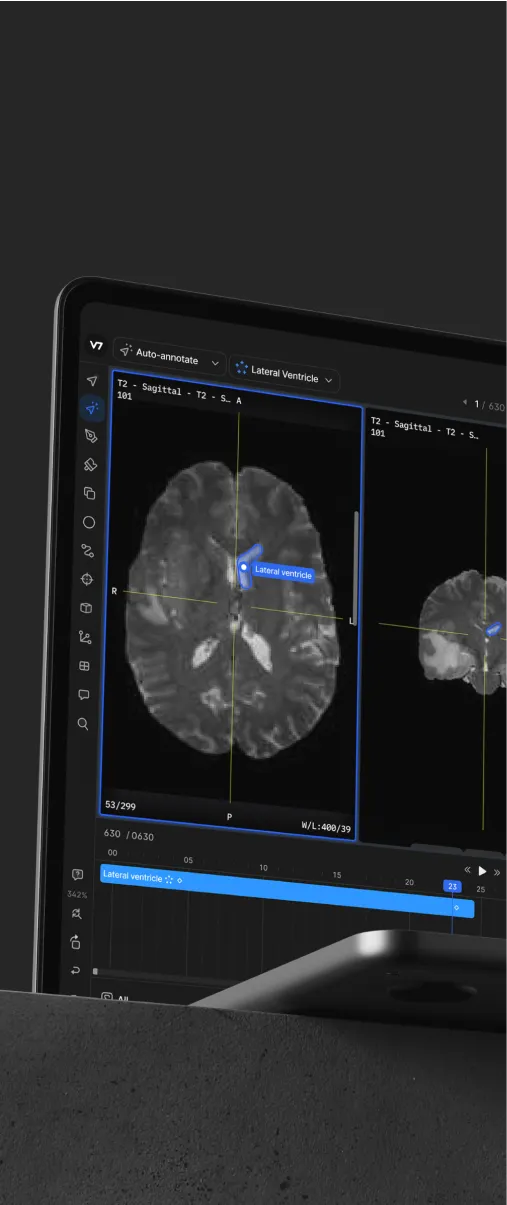
Harnessing multiple views and perspectives significantly simplifies the annotation process for medical imaging datasets. It streamlines navigation between various anatomical structures and offers richer context. While V7 Darwin's multi-slot feature has been a staple for some time, it's only now that we've fully integrated voxel support.
Voxels in multi-planar medical data
Medical imaging, especially in modalities like computed tomography and magnetic resonance imaging, captures data as a sequence of slices, predominantly in the axial plane. These cross-sectional snapshots of the body consist of volumetric pixels or voxels.
Rather than obtaining sagittal (side vertical slices) and coronal (front vertical slices) planes separately, they are reconstructed from the original axial data. These supplementary planes offer varied projections of the same foundational data, a technique known as MPR (Multi-Planar Reconstruction).
The essence of this reformatting lies in the volumetric nature of the original data. Distinct from traditional pixels, voxels possess width, height, and depth, corresponding to the spacing between consecutive slices in a DICOM or NIFTI series.
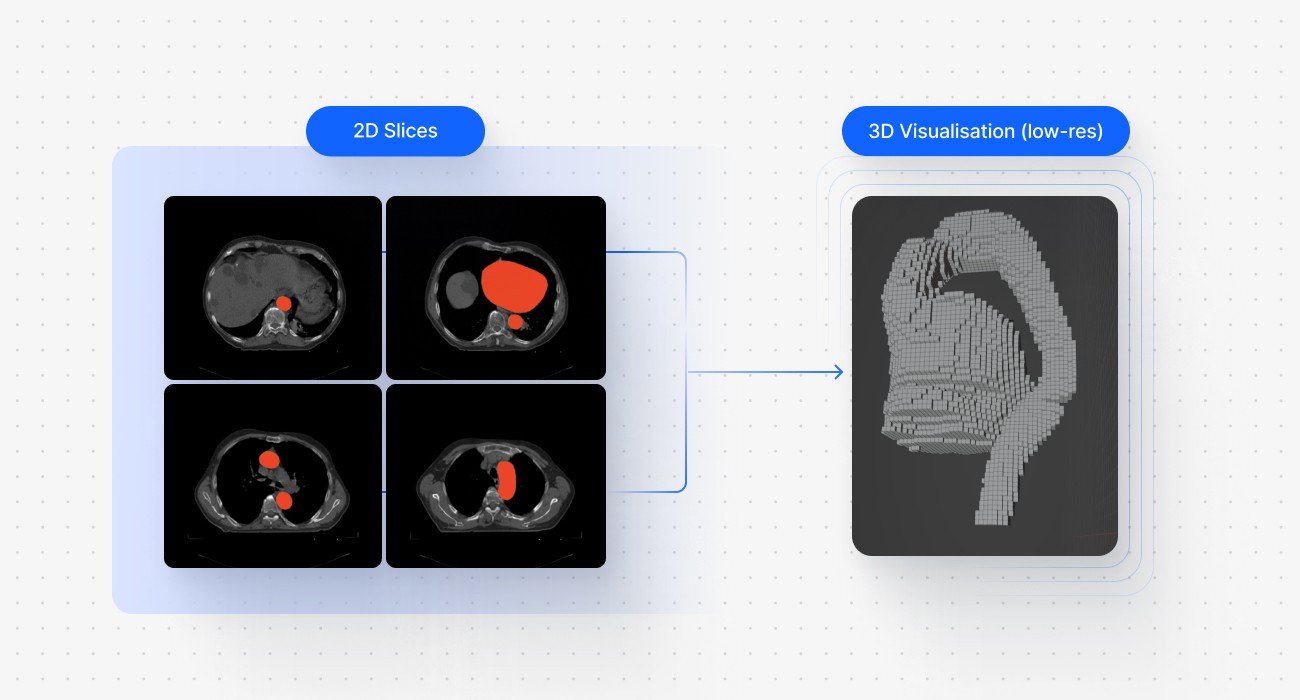
Moreover, sequences of semantic masks are frequently transformed into a 3D visualization. Consider the example above - a selected set of slices of a CT scan showcasing annotated heart and aorta regions, and a 3D representation derived from the semantic masks. Note that this particular example uses lower resolution to illustrate the voxel-bases structure of the render.
Multi-planar views offer a holistic understanding of anatomy and pathological findings, simplifying diagnosis and treatment planning. Furthermore, voxel data is instrumental in training AI computer vision models for healthcare with unmatched precision and accuracy.
How to use voxel annotations in V7
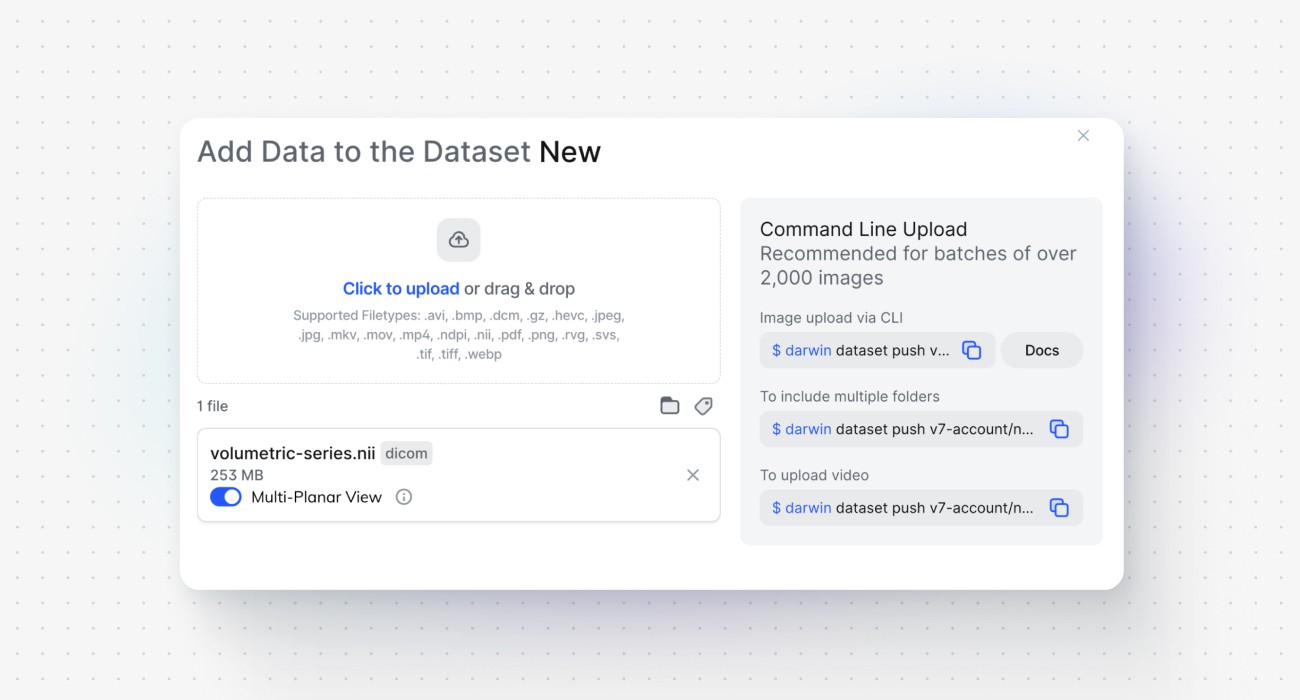
If you're working with standardized medical imaging files, V7 has you covered with all essential features activated by default if you toggle the Multi-Planar View during the import. You can try out creating your voxel masks in 3D by following the steps described below.
Step 1: Add your volumetric series file to a dataset
Simply drag and drop your chosen file into your V7 dataset. Extract multi-slot views to access axial, sagittal, and coronal planes.
Step 2: Create a mask class with a descriptive name
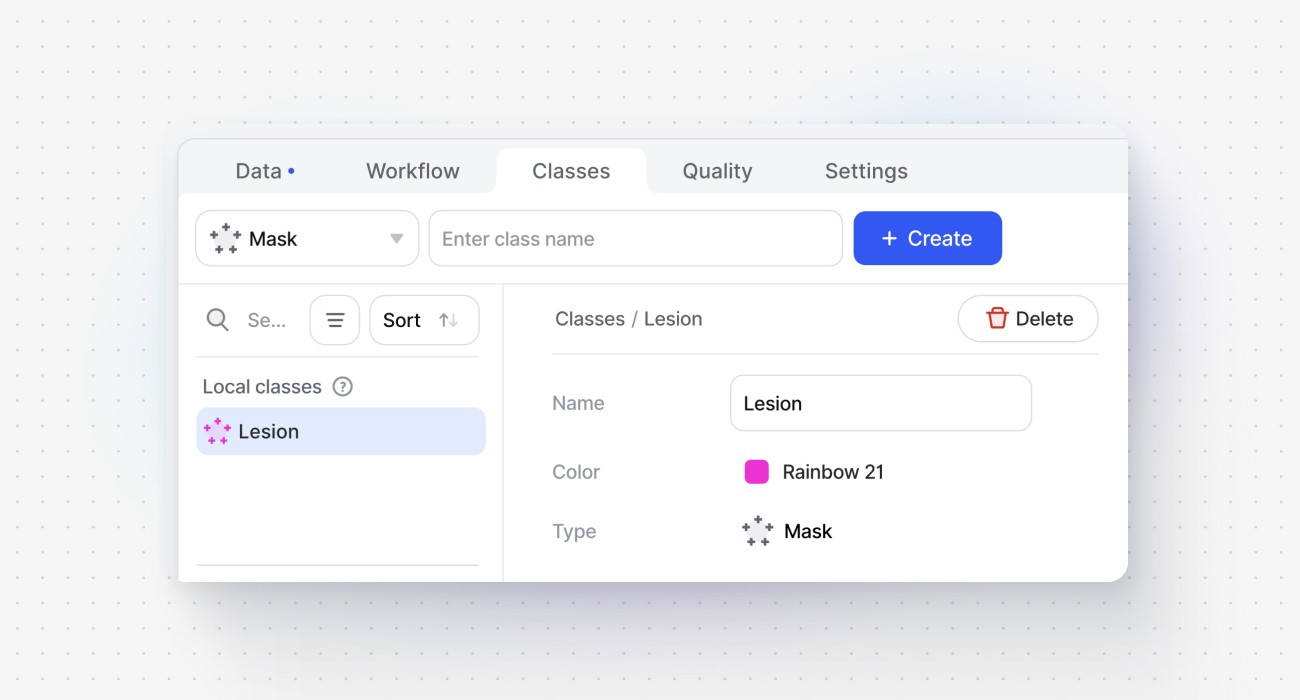
Before delving into the primary annotation panel, navigate to the Classes tab and set up a new mask class.
Step 3: Begin with the Brush Tool
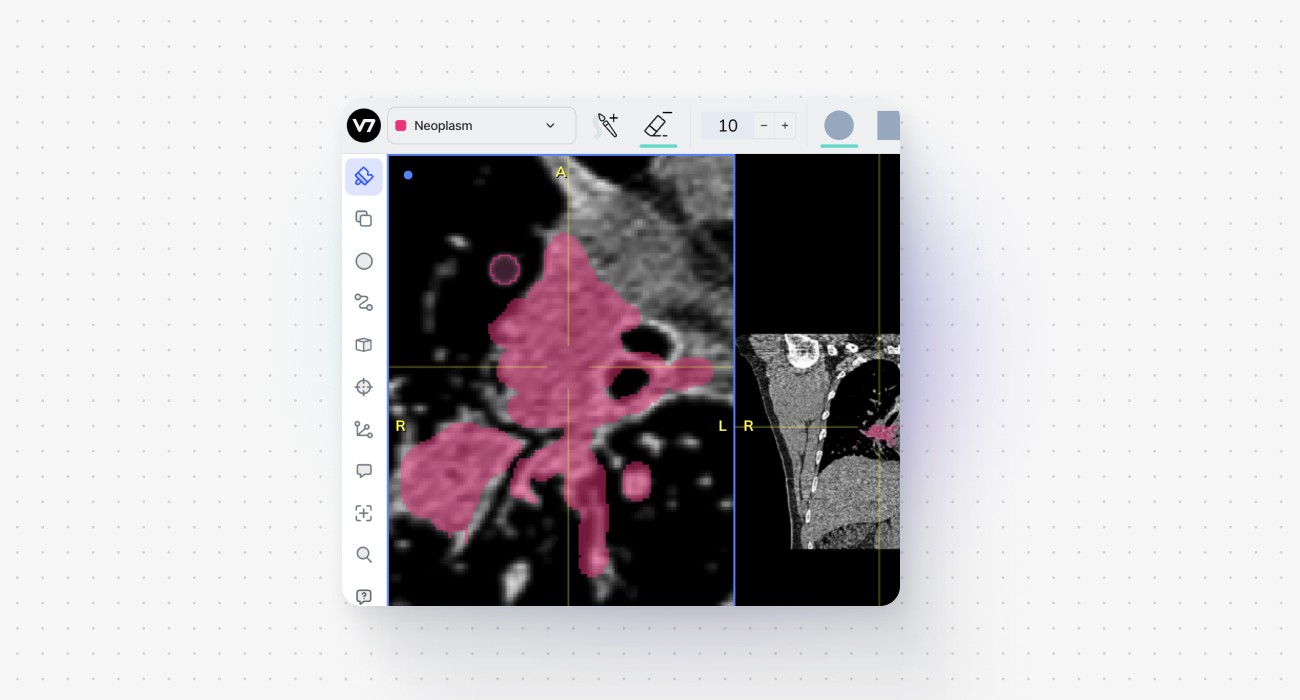
Begin by sketching your initial annotations on one plane using broad strokes. While precision is valued, it's not imperative at this early stage - any inaccuracies can be refined and corrected later on.
Step 4: Jump between views and use additional tools
Alternate between planes to modify or erase voxels from your annotation. Incorporate tools like Crosshairs and Zoom to speed up your annotation process, ensuring clarity and precision.
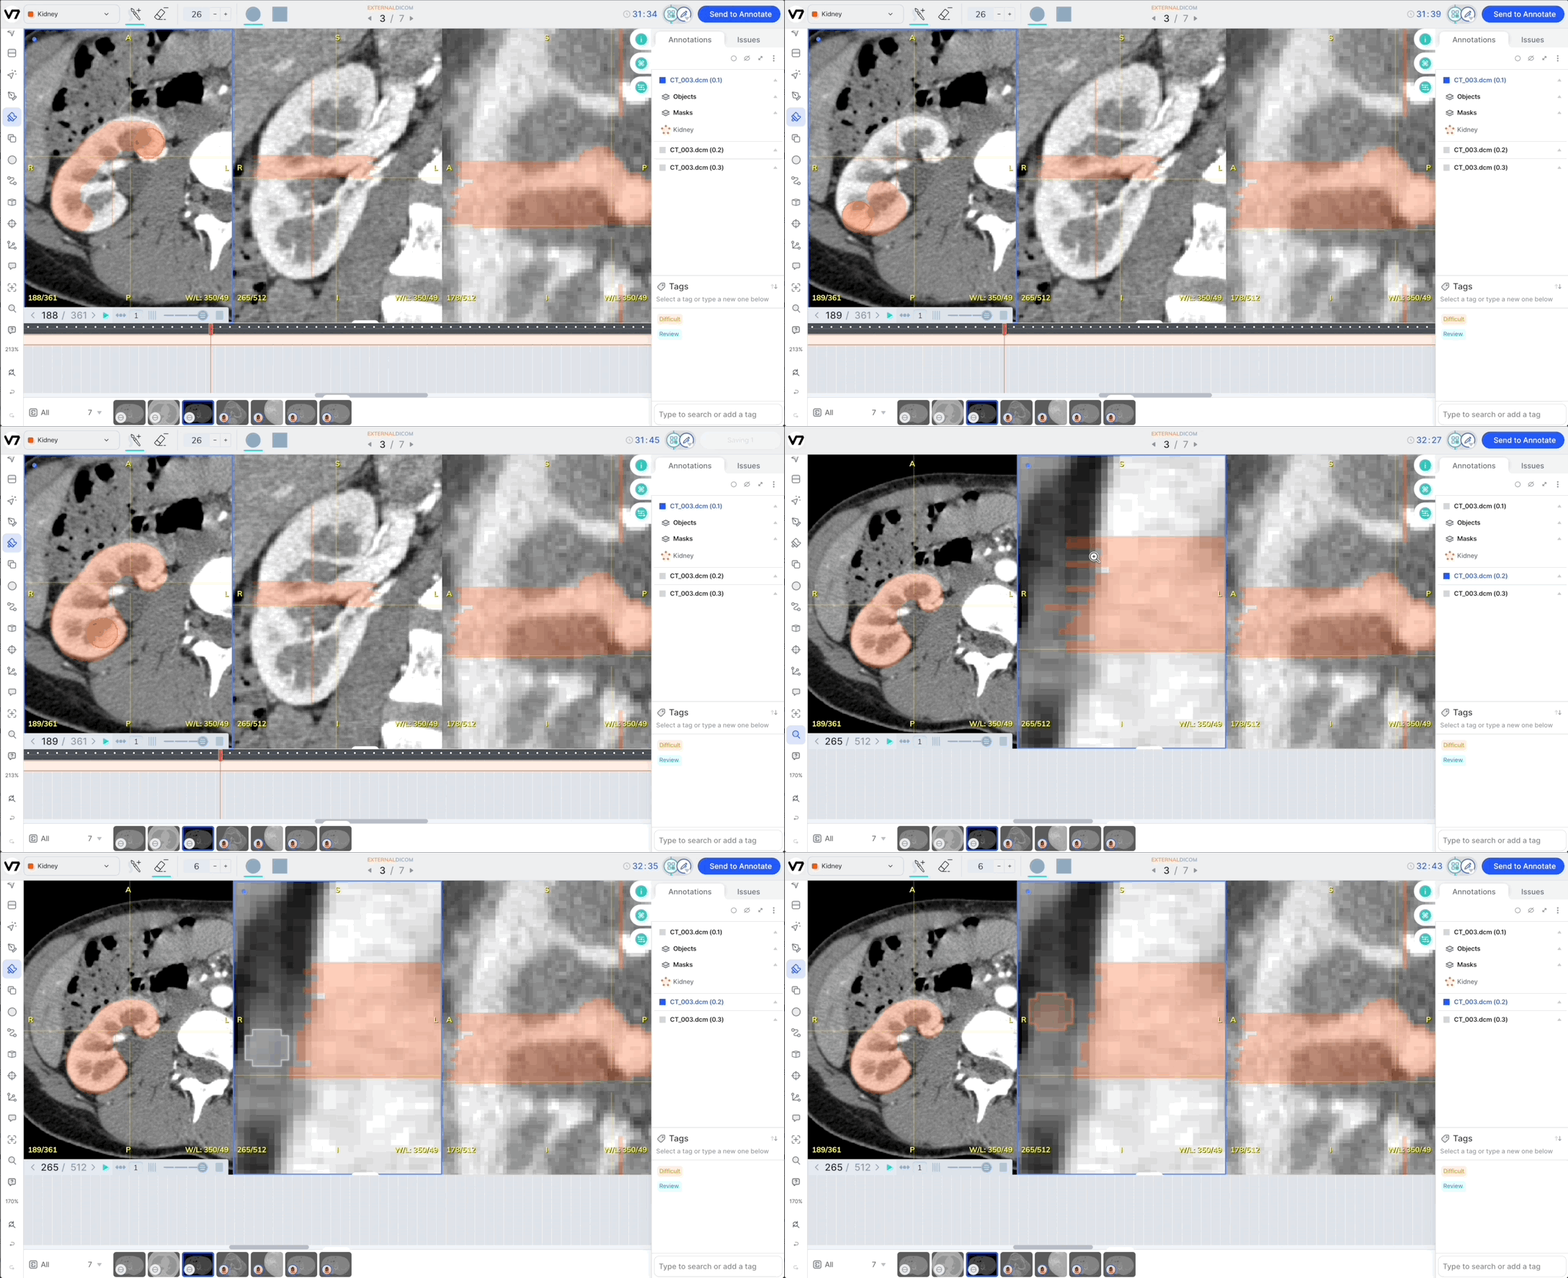
Step 5: Export your annotations
Once satisfied with the results, generate Darwin JSON files containing your annotation details. Each slice will be paired with its respective dense RLE (Run-Length Encoding) data with pixel values.
For a deeper dive, explore more about multi-planar annotations in our documentation.
Common use cases
Multi-planar views and voxel annotations provide radiologists with a comprehensive understanding of the region of interest. While the axial plane might be ideal for visualizing certain structures, the sagittal or coronal plane might be more suitable and convenient for specific use cases.
Tumor Detection: Identify and annotate tumors in one view and refine the annotations in another, ensuring that the entire mass is accurately captured.
Vascular Studies: Study the intricate network of blood vessels in 3D, understanding their course and relationship with surrounding structures.
Orthopedic Imaging: Analyze bone structures, fractures, and more with a detailed 3D perspective.
V7's complete voxel support offers the versatility to interpret and annotate data in the most clinically pertinent manner, leading to the development of superior AI solutions for healthcare.
If you're new to our community, we invite you to create a V7 Darwin account and experience the transformative power of V7 annotations firsthand. For our existing users, this is the perfect time to dive in and explore the new features. Remember, every innovation is an opportunity to enhance accuracy, improve patient care, and push the boundaries of what's possible in medical imaging.

