Data labeling
Annotating With Bounding Boxes: Quality Best Practices
5 min read
—
Jul 6, 2021
What to pay attention to and what to avoid when annotating with bounding boxes? Follow this set of best practices to ensure your model's highest accuracy.

Co-founder & CEO
Drawing a box around an object seems like a task that any 5-year-old could easily master.
And it is. However—
Things are slightly different when it comes to drawing bounding boxes for training your computer vision project ideas models.
Poor quality training data, lack of precision and consistency, or too many overlaps will cause your model to underperform. Seemingly small details can have a huge negative impact that you might spend hours trying to reverse.
Our job is to help you avoid that—
That’s why we’ve put together a set of best practices for annotating with bounding boxes shared by top computer vision teams that we work with.
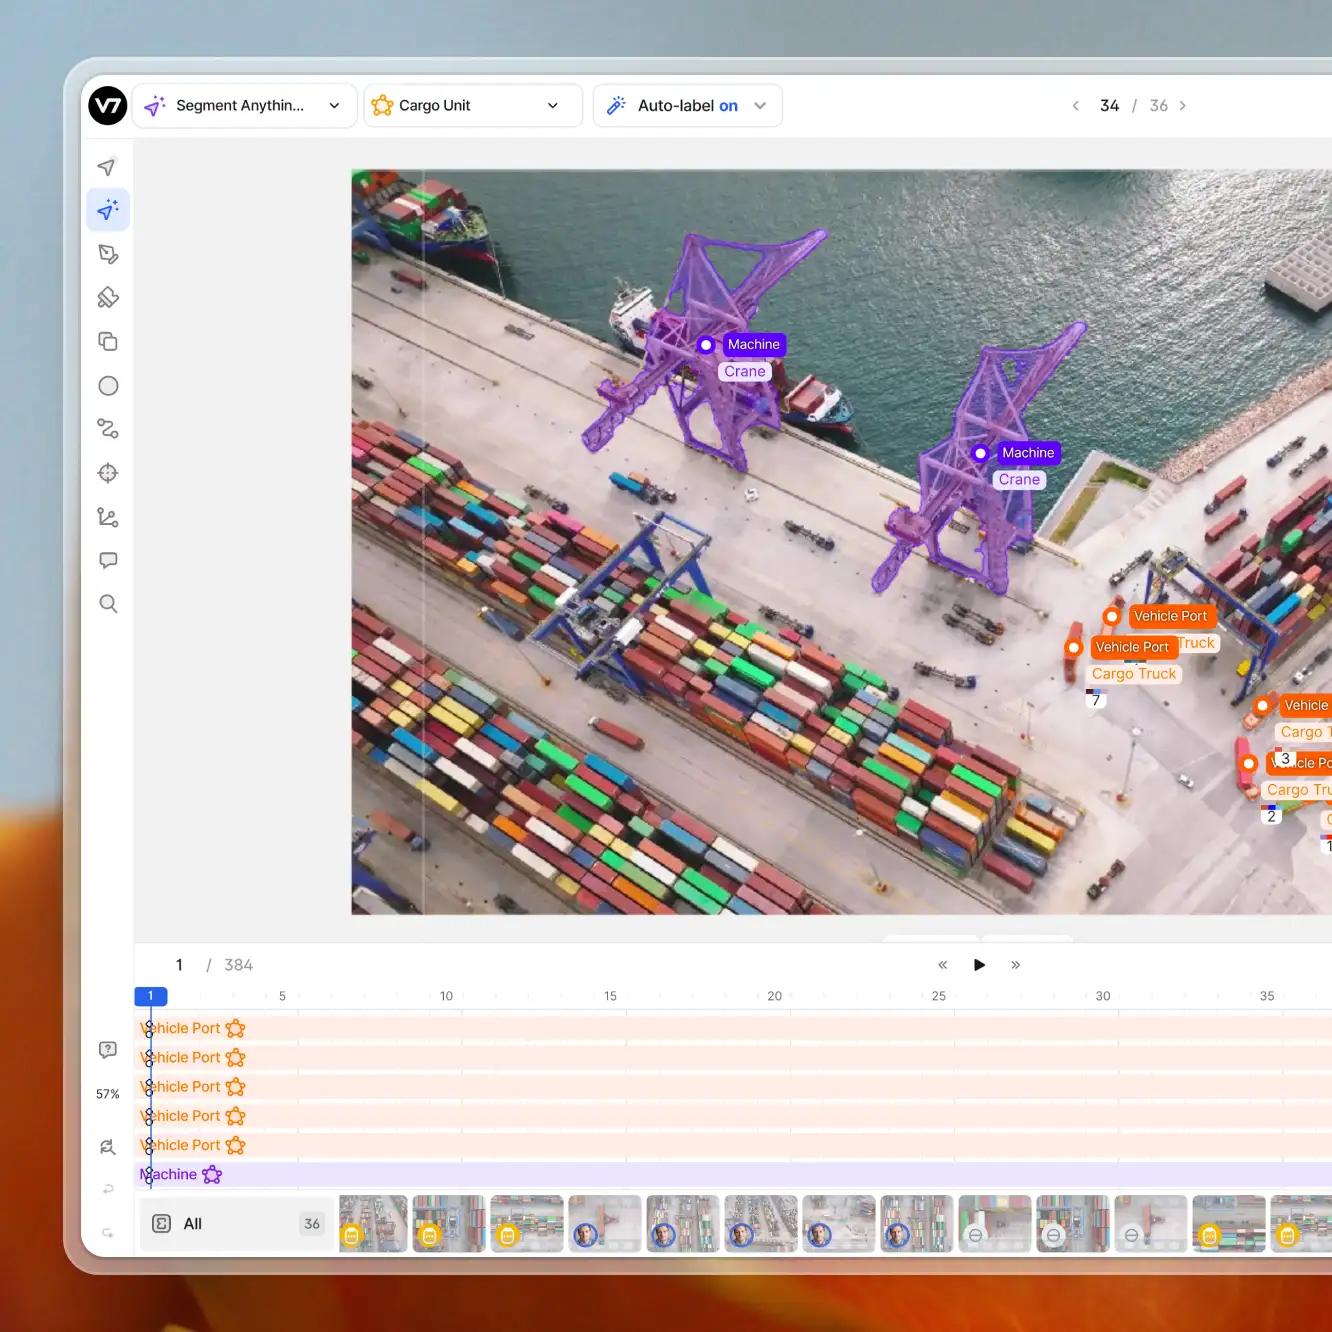
Note: While we'll occasionally refer to how V7 handles bounding box annotation, this set of best practices is designed to help any team ensure they get quality machine learning models, regardless of which labeling software they use.
Let's get right into it.
Top 5 bounding box annotation best practices
Here are a few things to remember when working with bounding boxes.
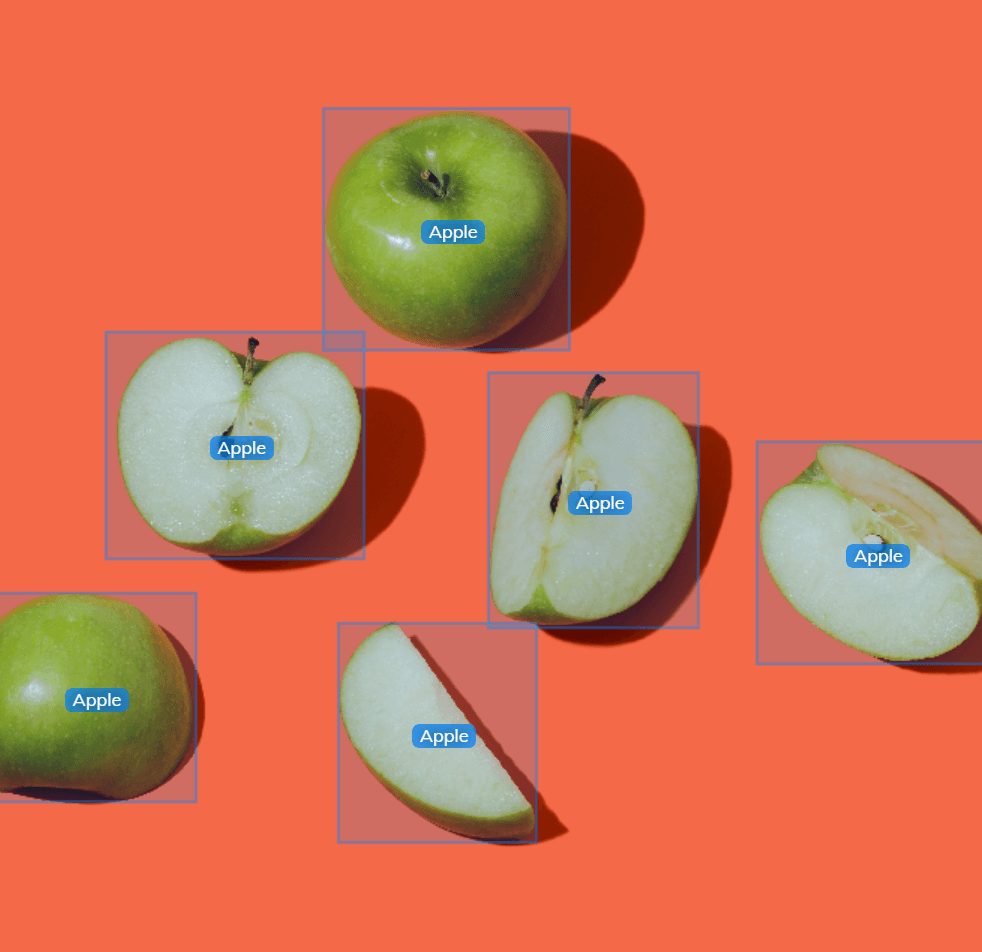
Ensure pixel-perfect tightness
The edges of bounding boxes should touch the outermost pixels of the object that is being labeled.
Leaving gaps creates several IoU discrepancies (see below). A model that works perfectly may punish itself because it hasn't predicted an area where you have left a gap during labeling data.
Callout: Intersection over Union (IoU) is measured as the area of overlap between your model’s prediction and the ground truth, divided by their union. IoU tells you much of the total area of an object your predictions tend to cover.
Two perfectly overlapping annotations have an IoU of 1.00.
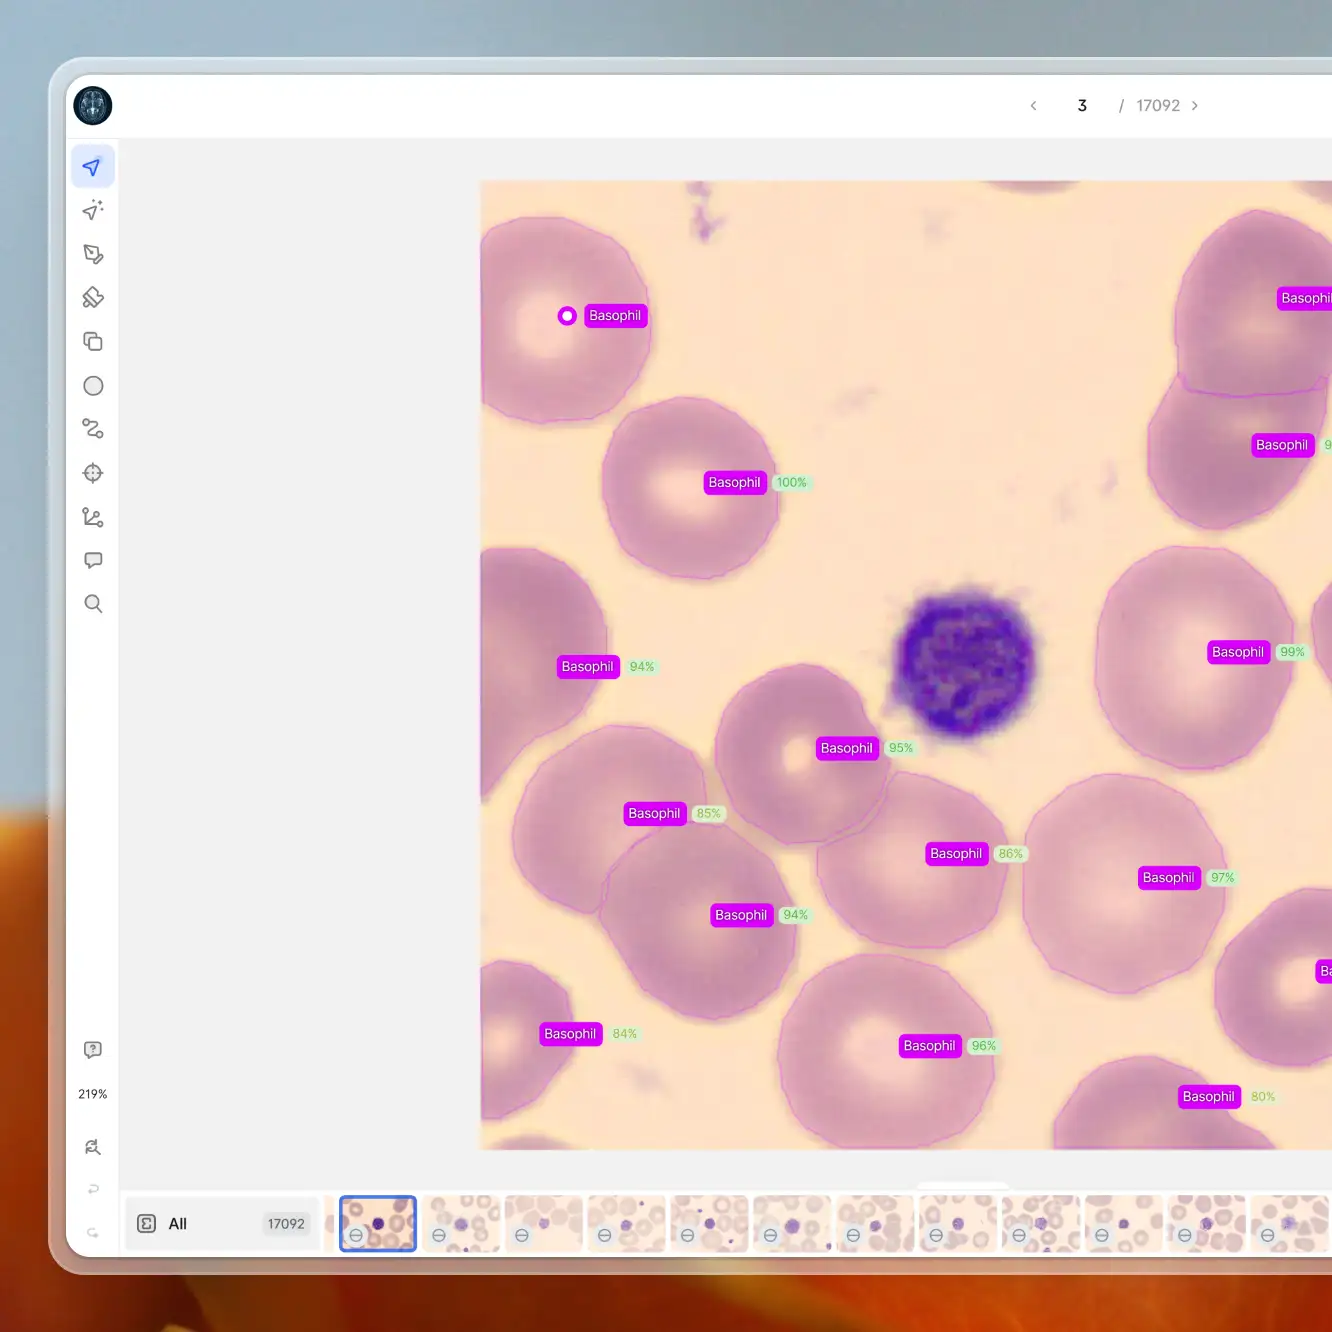
Pay attention to box size variation
Variations in box size in your training data should be consistent.
If an object is usually large, your model will perform worse in cases when the same type of object appears smaller.
Very large objects also tend to underperform. It’s because their relative IoU is impacted less when they take up a large number of pixels than when they take up a smaller number in medium or small objects.
Suppose your project contains a high number of large objects—
In that case, you may want to consider labeling objects with polygons rather than bounding boxes and running instance segmentation models rather than object detection.
Check out A Gentle Introduction to Image Segmentation for Machine Learning and AI to learn more about different image segmentation techniques.
Reduce box overlap
As bounding box detectors are trained to consider box IoU, you should avoid overlap at all costs.
Boxes may often overlap in cluttered groups such as objects on a pallet or items on store shelves like the wrenches below.
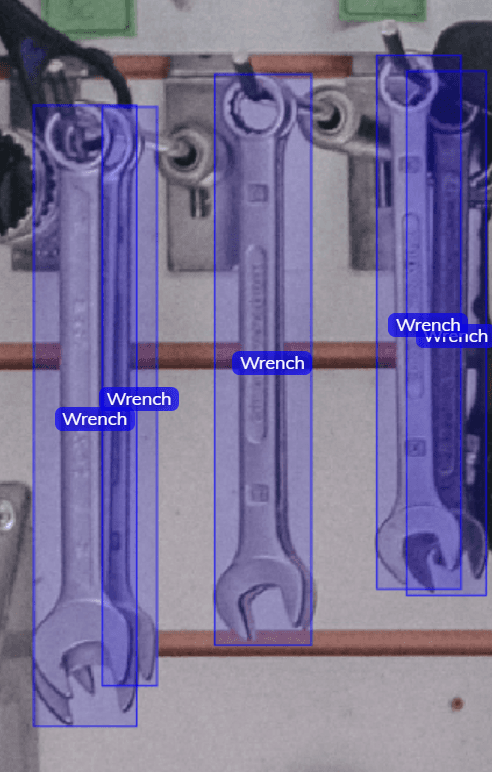
If these objects are labeled with overlapping bounding boxes, they will perform significantly worse.
The model will struggle to associate a box with the item enclosing it for as long as two of them overlap frequently.
Consider labeling the object using polygons and using an instance segmentation model if you cannot avoid overlap due to the nature of your images. You'll be able to expect a 10%+ recall improvement.
Take into account box size limits
Consider your model’s input size and network downsampling when establishing how large the objects you label should be.
If they are too small, their information may be lost during the image downsampling parts of your network architecture.
When training on V7's built-in models, we recommend assuming potential failures on objects smaller than 10x10 pixels, or 1.5% of the image dimensions, whichever is larger.
For example, if your image is 2,000 by 2,000, objects below 30x30 pixels will perform significantly worse.
Nonetheless, they will still be identified.
While this is true of V7's models, it may not be true on other neural network architectures.
Looking for the perfect data annotation tool? Check out 13 Best Image Annotation Tools to compare your options.
Avoid diagonal items
Diagonally positioned objects, especially thin ones such as a pen or road marker, will take up a significantly smaller bounding box area than their surrounding background.
Take a look at the annotation below.
To human eyes, it seems obvious that we are interested in the bridge, but if we enclose it in a bounding box, we're actually teaching the model to credit each pixel within this box equally.
As a result, it may achieve a very high score just by assuming that the background around your object is the object itself.
As with overlapping objects, diagonal objects are best labeled using polygons and instance segmentation instead. They will, however, will be identified given enough training data with a bounding box detector.
Ready to train your models? Have a look at Mean Average Precision (mAP) Explained: Everything You Need to Know.
V7 bounding box annotations: Best practices
Now, let us share a few tips and tricks for annotating your images using V7.
Speed-labeling bounding boxes
Firstly, when you are labeling with bounding boxes, you can press Q to quickly switch between bounding box classes.
Search by the class name, and hit enter to confirm.
You can also add a hotkey when adding or editing a class to make selecting a class as fast as pressing a number on your keyboard.
Bounding boxes of similar size can be copied and pasted with Ctrl + C and Ctrl + V.
Speed-reviewing bounding boxes
When reviewing images or videos that include bounding boxes, press Tab to cycle between selected bounding boxes quickly.
Use the arrow keys to move a bounding box around, and hold shift to speed up the movement.
Press § or ` to cycle points and use the arrow keys or shift + arrow keys to adjust the width or height of a box.
Bounding boxes in video
When annotating with bounding boxes in the video, V7 will automatically interpolate changes between edited frames.
You can create a bounding box, skip a few frames, make an edit, and the intermediate frames will adjust automatically.
Bounding box annotations: Next steps
That's it—now drawing bounding boxes with a pixel-perfect precision should be a walk in the park :)
Remember that the quality of your data annotations define the accuracy and reliability of your model.
If you'd like to label your data using other tools such as polygons, keypoint skeleton, or polyline, this video might come in handy:
For learning more about automating your labeling, check out: Automated Annotation with V7 Darwin.
Got questions? Let us know :)